
12/07/2014
This build with the exception of the vacuum table is pretty much complete, to continue following along with the upgrades and completion of the vac table follow this build:
http://www.openbuilds.com/builds/clydesdale-cnc.1428/
10/30/2014
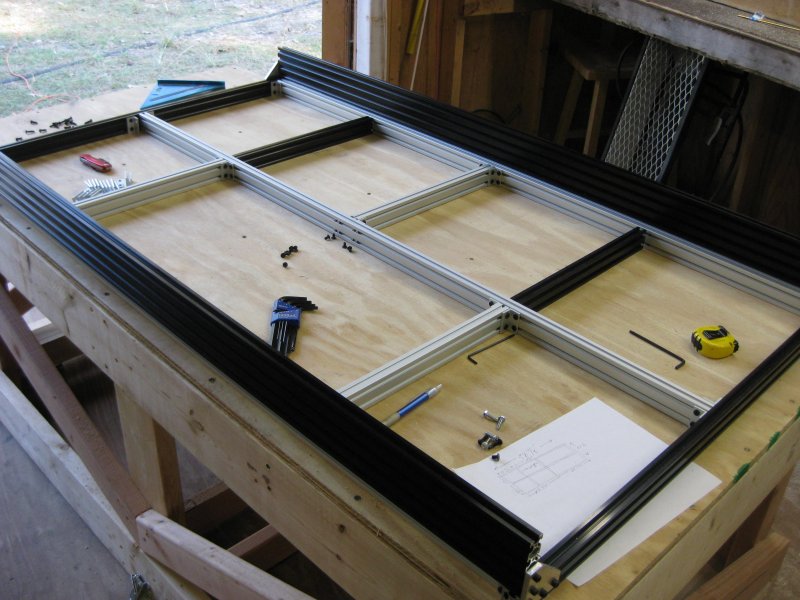
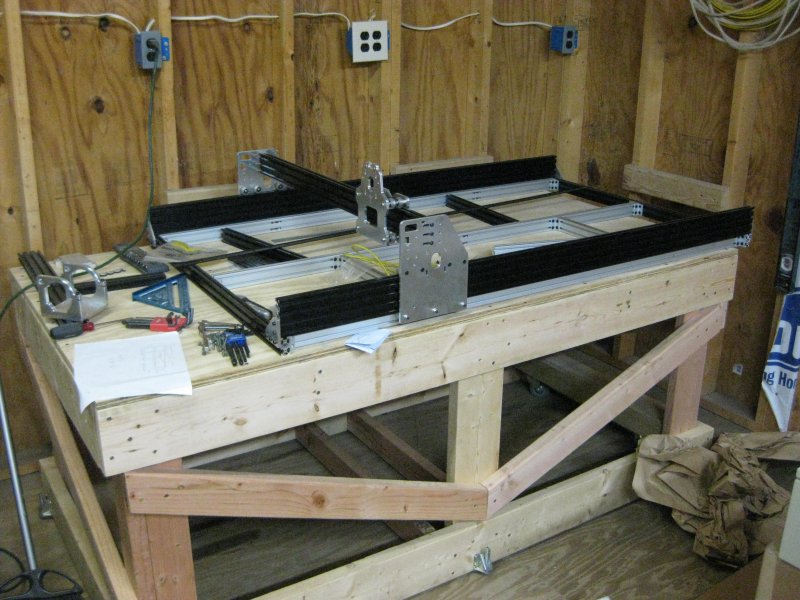
I will be building a 1500 x 750 mm Ox as second machine to take some of the load off my 5' x 9' machine that I use for my sign business.
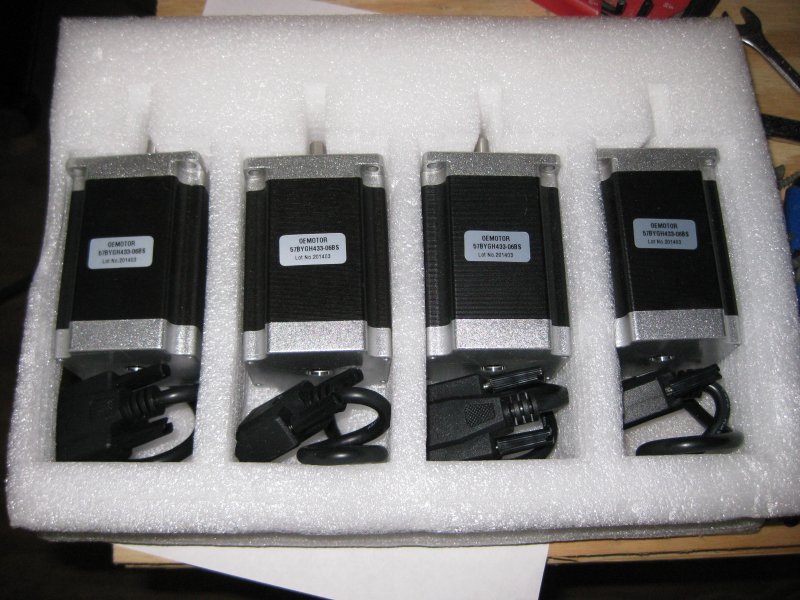
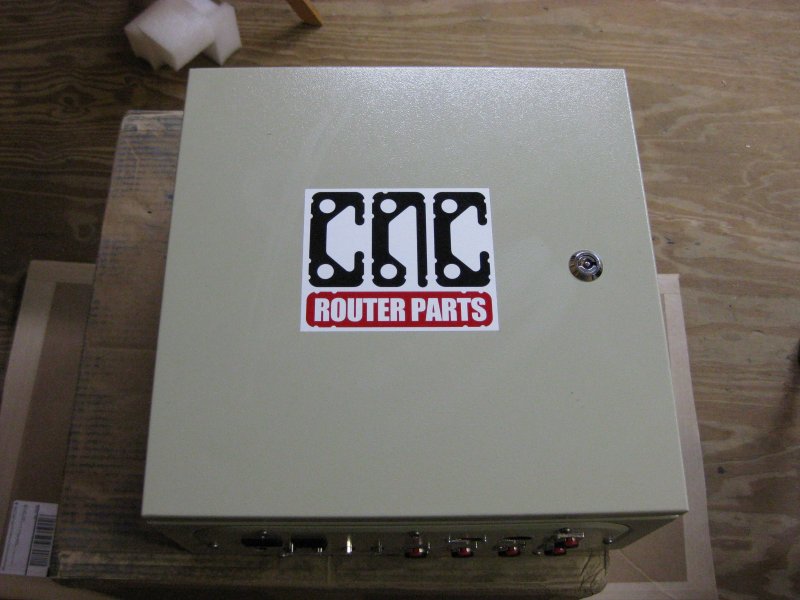
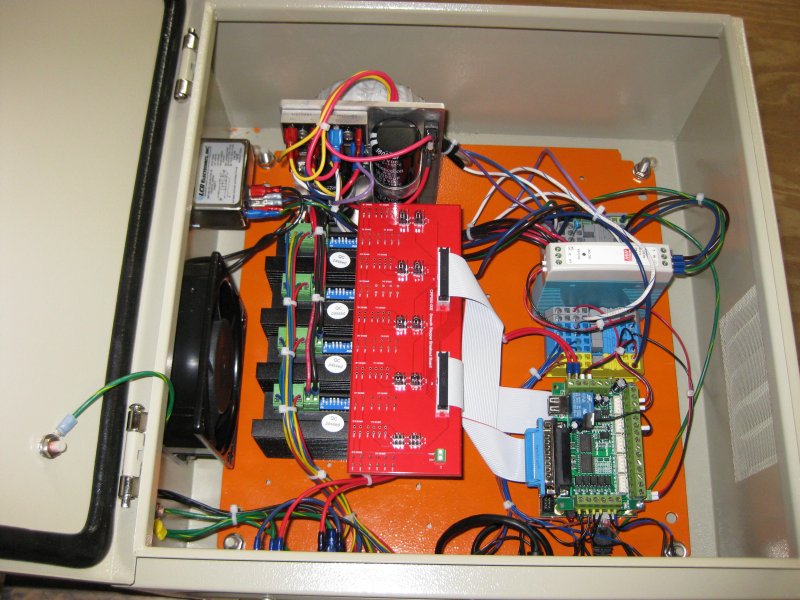
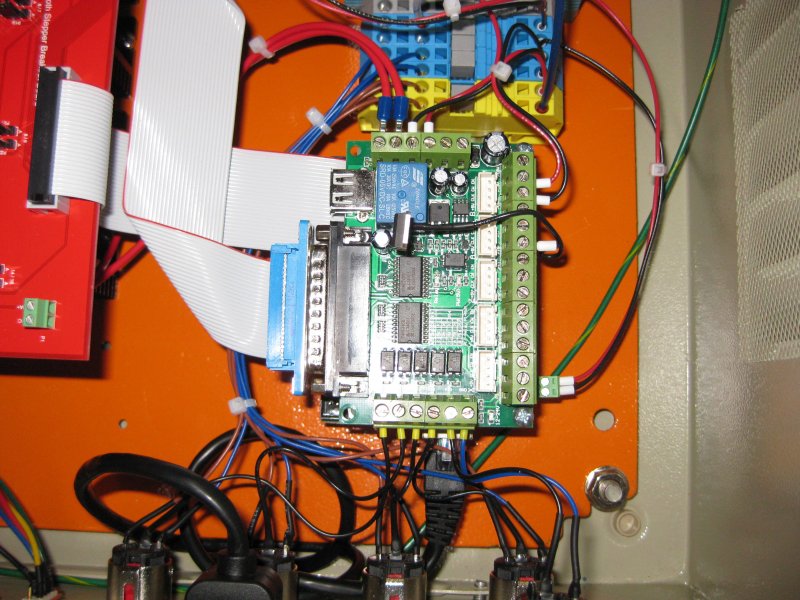
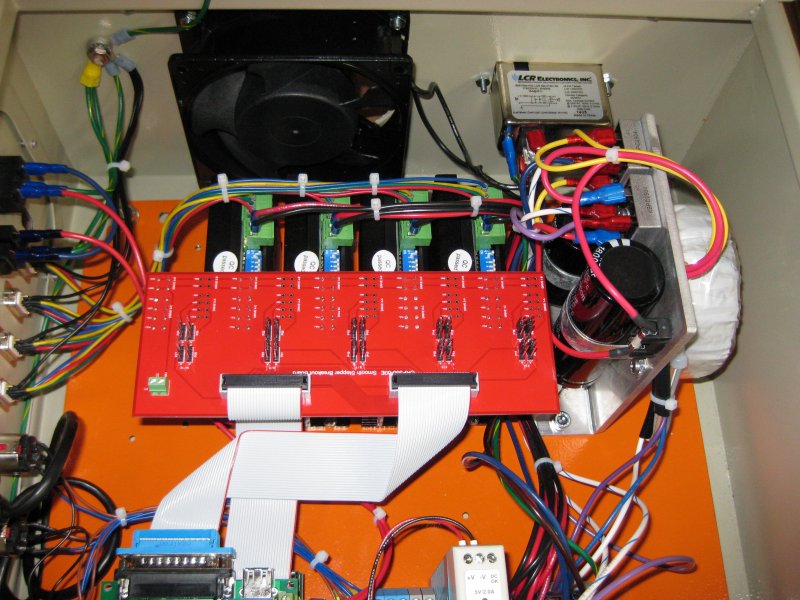
The construction will be a wooden base with the machine mounted to a heavily braced 3/4 sanded on one side ply top. Cutting area should hopefully work out to around 50-52 inches x 24-25 inches. The electronics will consist of a Cncrouterparts 4 Axis Nema 23 Plug and Play setup with 5-Fuchs proximity switches handling limits, homing, and gantry squaring.
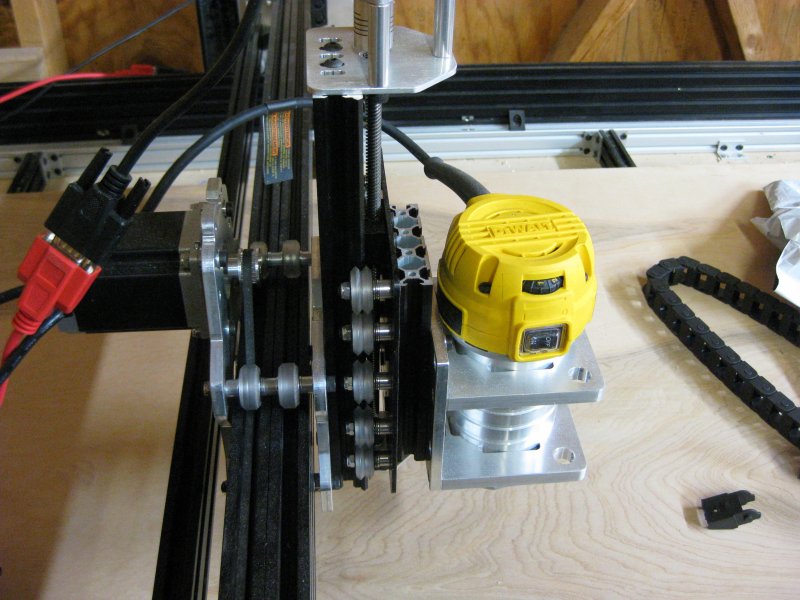
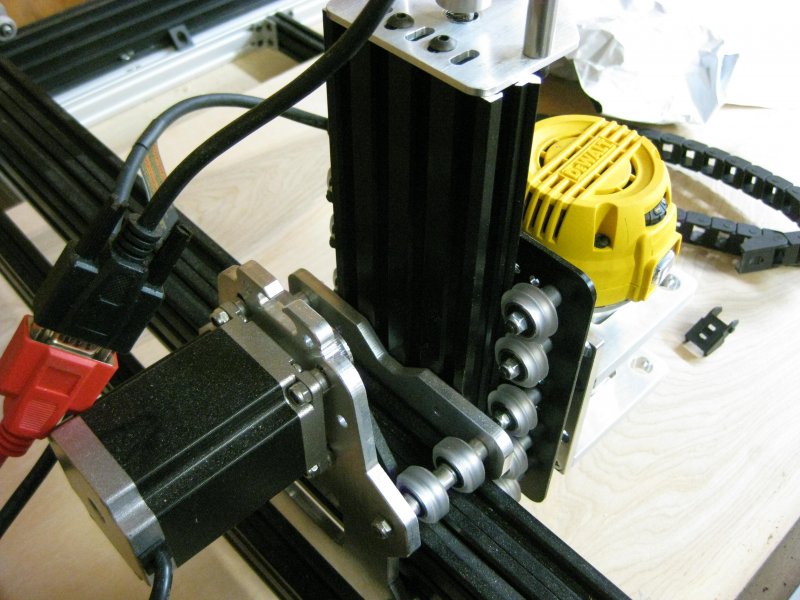
I will be using plates from Chris Laidlaw and router mount for a 611 Dewalt router. Collets and collet nuts will be by Precision Bits.
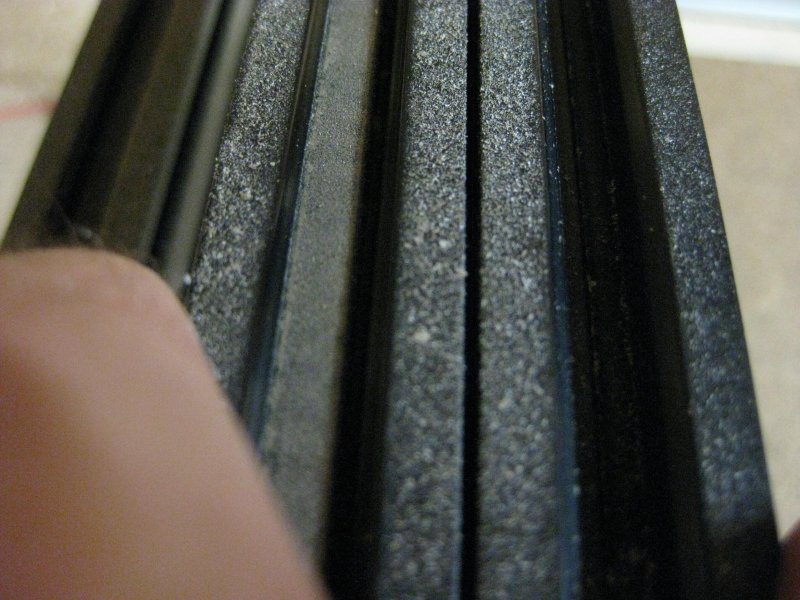
I am also substituting regular 2040 extrusions for the base bracing due to the fact I couldn't find any 2040 V-slot avail at the time of purchase.
The spoilboard will be a vacuum bleeder board design, 2 layers of MDF with a top layer of Trupan Ultralight MDF.
Most parts have just been purchased, just waiting on them to arrive to start assembly, the electronic package has a 2-3 week lead time so we'll see how much we can get done before hand.
11/01/2014
The plates I ordered from Chris arrived today. Very nice work !! I ordered the plates, spacers, nema 23 mount for the Z, and a router mount for a 611 Dewalt compact router. Got alittle side tracked doing some upgrades on my sons 2014 Mustang GT today (Eibach springs, adjustable panhard bar, and Boss 302 intake), that I didn't get to building the base table. Hopefully tomorrow... Here's some CNC eye candy though.


11/04/2014
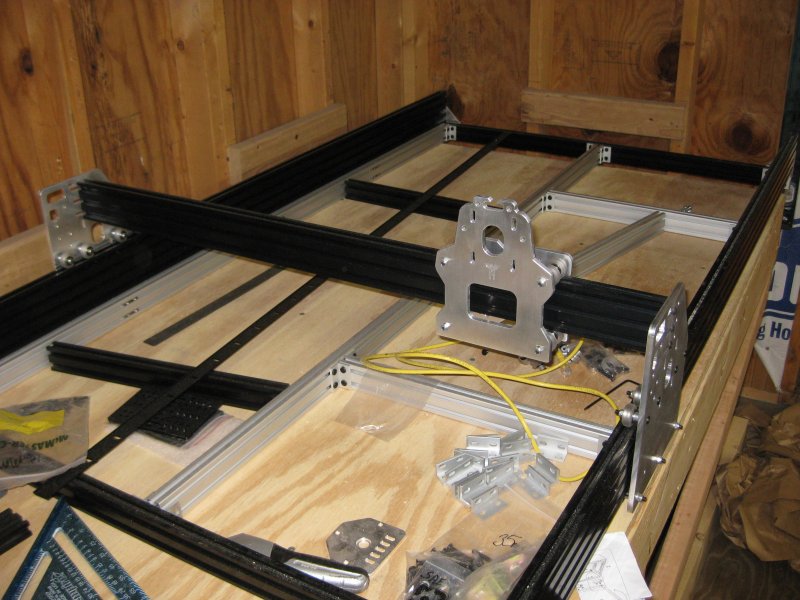
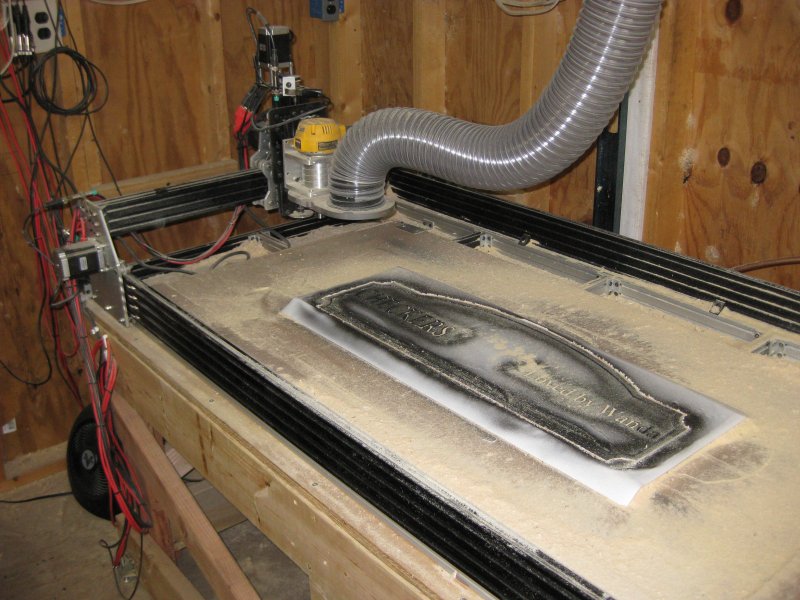
Finally got started on the base. I went with 6' x 3' just to get some extra room around the sides. I also had an idea I should have done with my larger machine, add WHEELS. I moved a few months ago and had to move my 5' x 9' machine 75 miles in a trailer and load into another building at my new place, we ended up using 10 - 6' pieces of 1 1/4 inch PVC pipe to roll it to its final location. This one has 4 caster wheels built in so when I lower it off of the adjustable feet it rides 3/4" above the floor on casters. I put 6 adjustable feet on it to make sure its level and stable. I'll be adding the 23/32 ply top to it tomorrow and drilling holes to accommodate the plumbing for the vacuum system. I received some 2040 rail from 8020 today to build the support base for the vacuum table (Openbuilds part store was out when I put in my order and waiting is not one of my strong suits).
11/07/2014
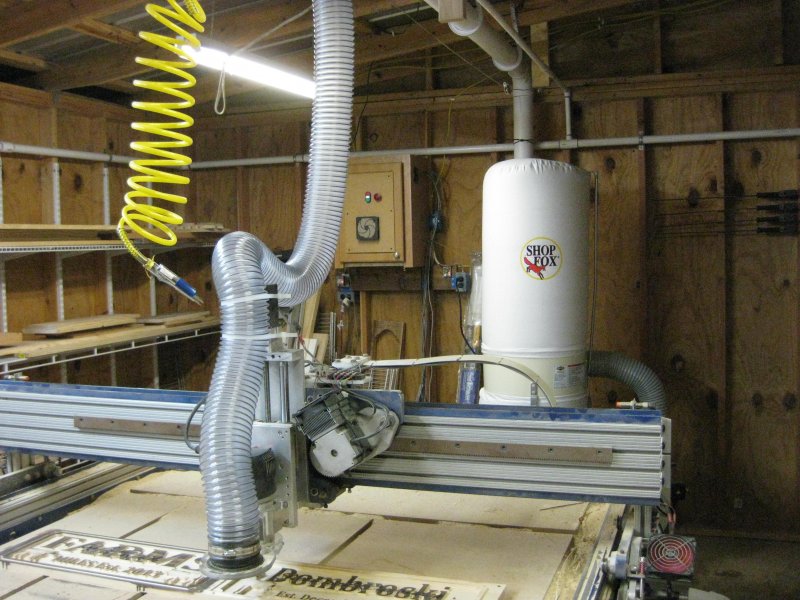
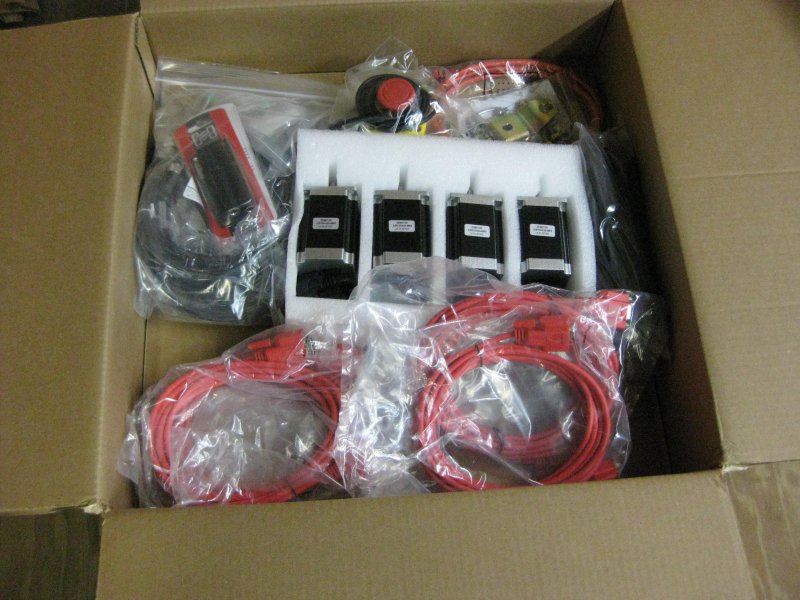
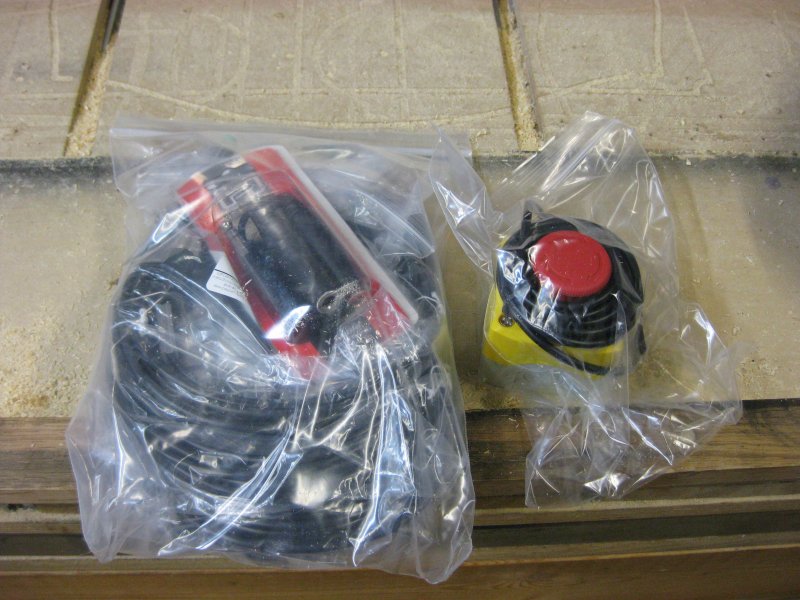
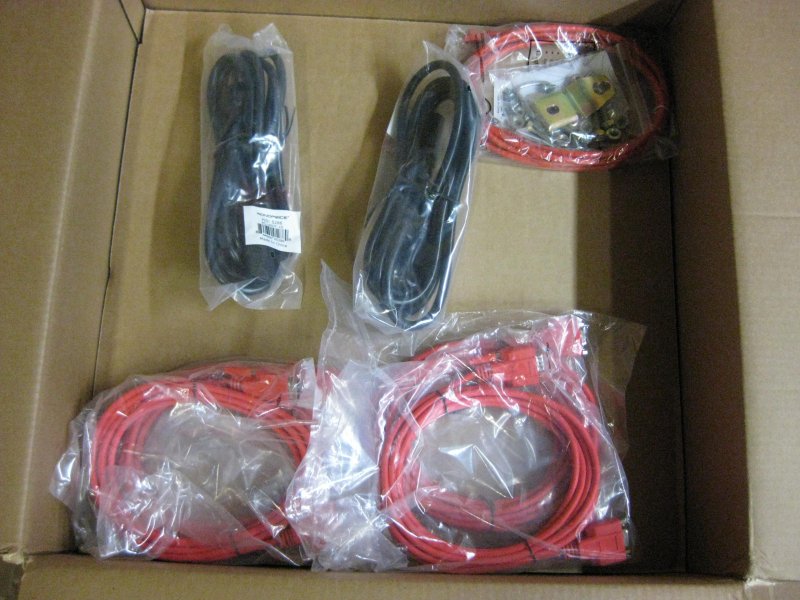
Received a few care packages today, misc parts from McMaster Carr arrived and a great package with the bulk of the V slot extrusions and fasteners to build the frame of the machine. Got the plywood top added to the base table yesterday. Will post some photos and updates tomorrow. Gonna be a busy day on Monday, my new Shop Fox 2HP dust collector, the remainer of parts from the Openbuilds store, and hopefully my electronics package from CNCRouterPart will show up.
11/09/2014
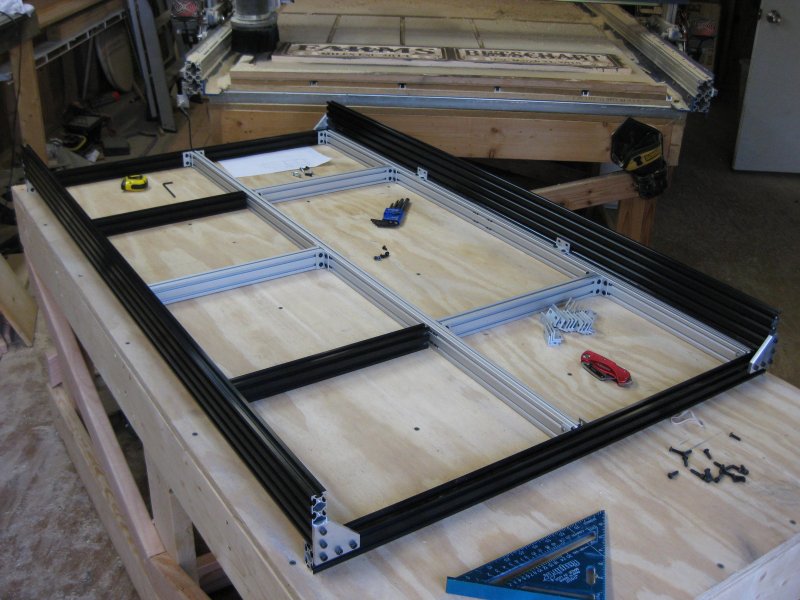
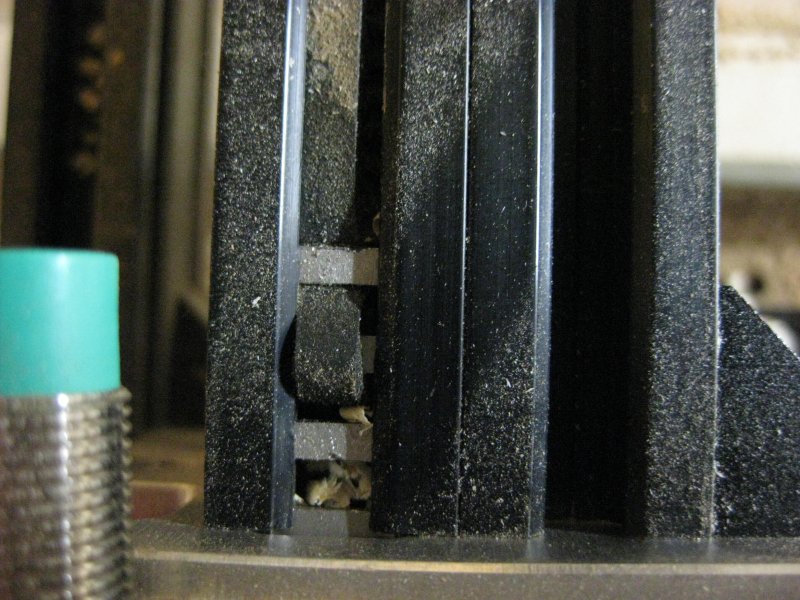
Well made some progress today, assembled the lower part of the base, got the cross braces installed with the exception of 1 (lol BOM oversight). I'm very pleased with the strength and rigidity of the base so far. Decided on a 4 zone vacuum setup breaking the spoilboard into approximately 15 x 28" zones each completely isolated from one another. Imagine a large POD setup with a 1/2 gap between them sealed with GE 100% Silicone. I'll be using my 6HP Ridgid shop vac for the moment as a vacuum source, I plan on just using 1 or 2 zones at a time for now so the Ridgid should be able to keep up. I'll be building a Blackbox 2 motor vacuum system with Lighthouse motors after the machine is finished as a long term solution. Just waiting on parts now... Stay tuned ...
11/13/2014
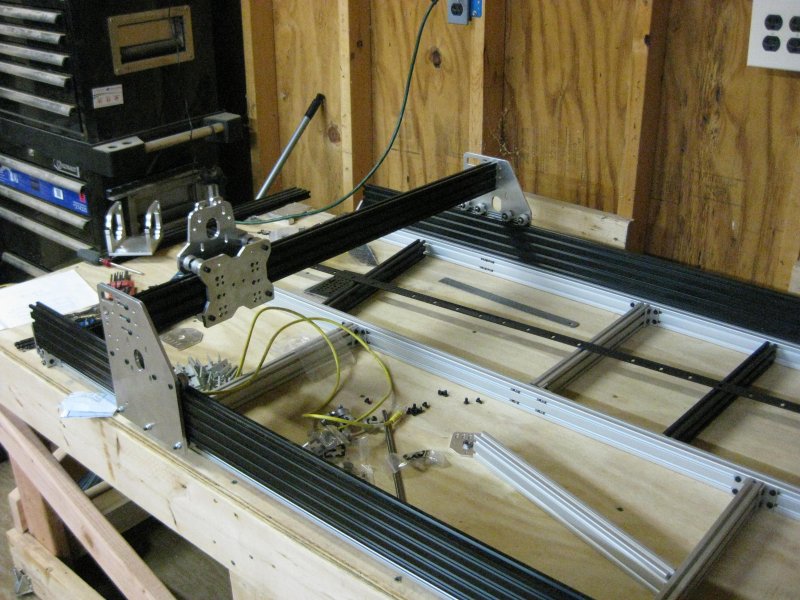
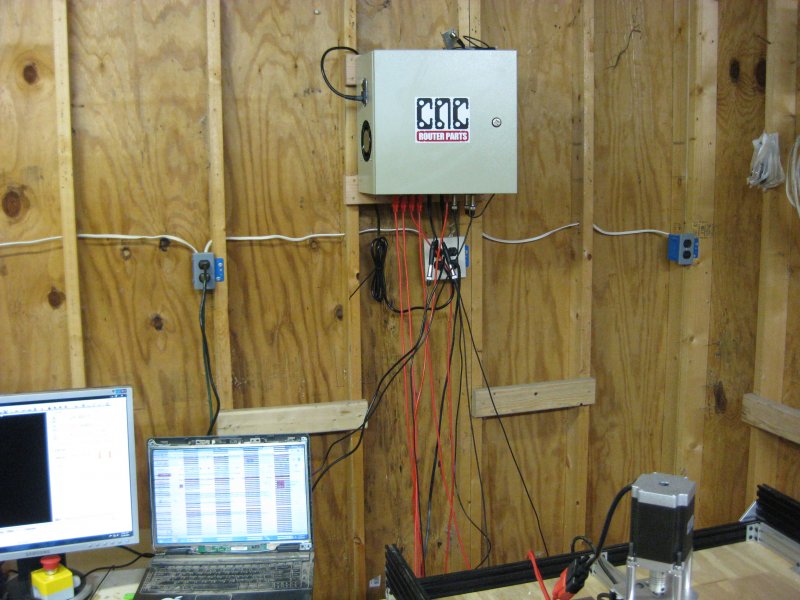
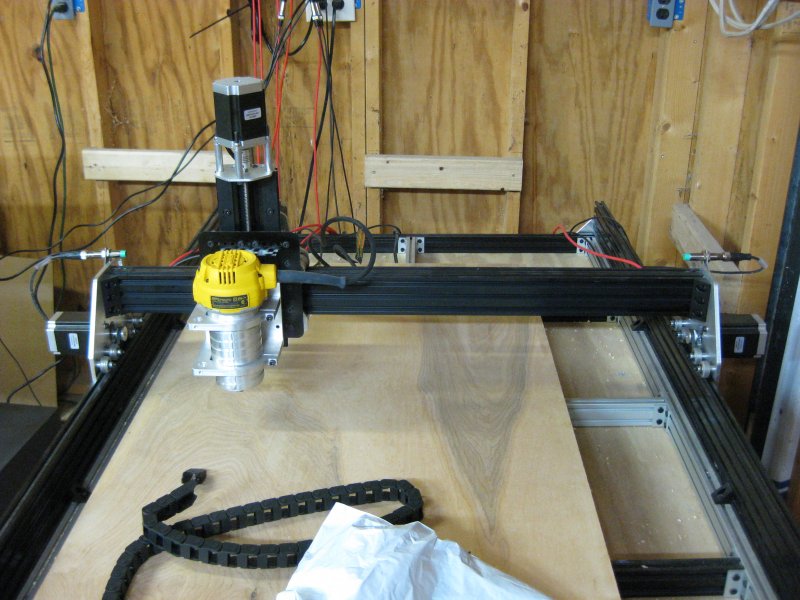
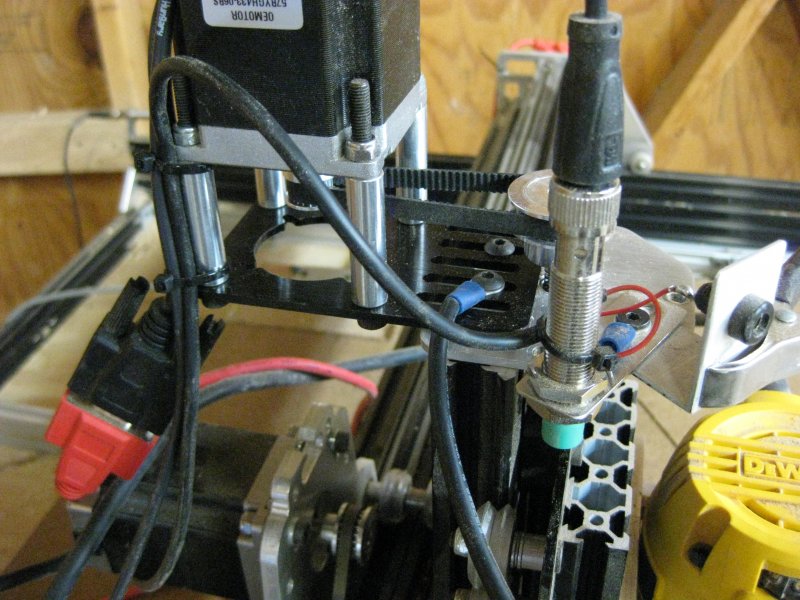
Some more progress made, put most of the gantry together, dry fitting everything. Received my electronics package today, looking forward to getting it installed. Also received my new Shop Fox 1 1/2 HP dust collector got it hooked up to the big machine and running today. Should be plenty big enough to run 2 possibly 3 machines. Just waiting on a couple packages from Openbuilds and Robocutters to arrive.
Check out the new photos below.
11/19/2014
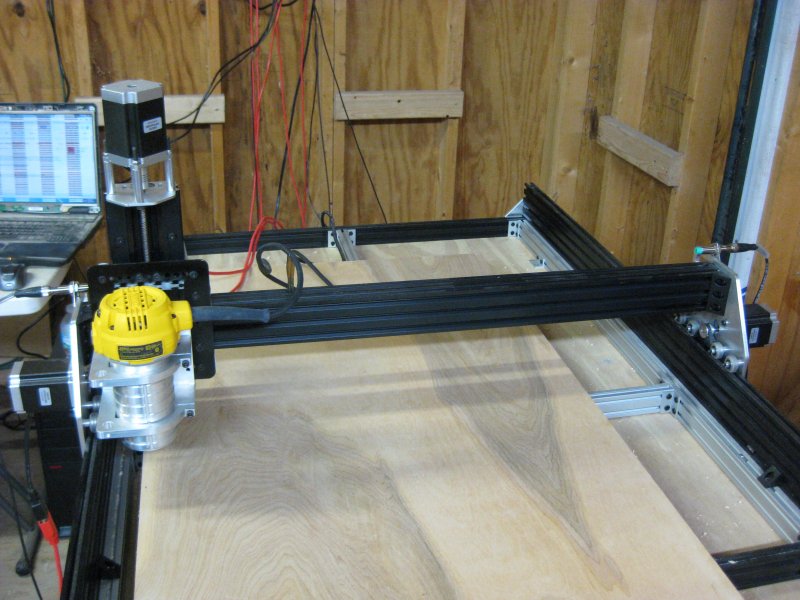
Ok everything has showed up and we've made alot of progress. The machine is fully assembled with the exception of a couple echains and a limit switch. Z slide is almost completed, just waiting on a new backplate for the router mount to fit the 2080. Got limits and homing setup last night and started cutting air. Nice and smooth movement on all axis. Belts need to be tightened, gantry squared, and the router trammed but very close to being completed. The vacuum table will be assembled on the side as I need to press the machine into service ASAP. I will document the vac table and it's installation as it progresses. I will post some video of it running a breakin gcode and some cutting ASAP.


11/20/2014
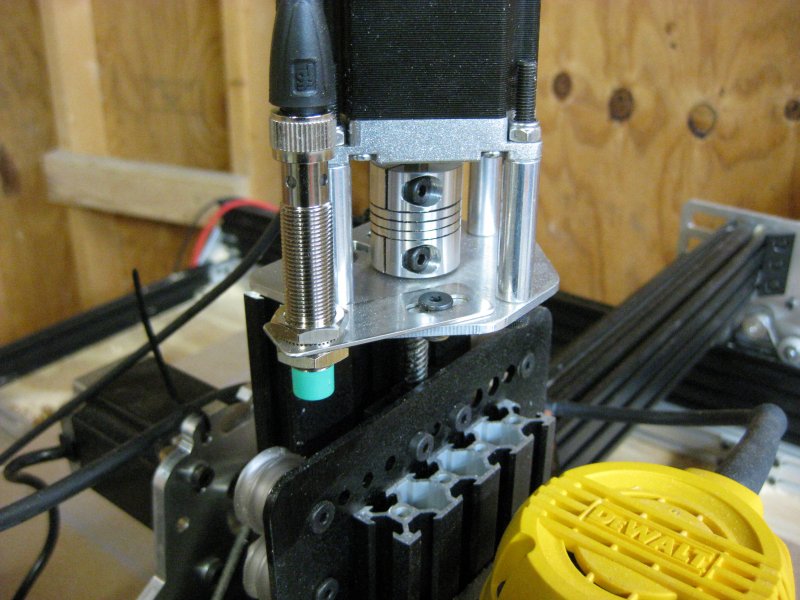
WE'RE CUTTING !! Got the spoilboard mounted last night, worked out a couple glitches with Mach 3 and the homing routine. Also rebuilt the Z slide, added a couple of shims in between the rub collars and installed the new router mount backplate designed to mount on 2060 and 2080. Thanks Chris for the quick turn around !!!! Installed a proximity switch on the Z to handle homing duties. Tightened all the belts, rehomed, mounted a test piece of wood and loaded a 3D cut file.
Rough cut - 1/4 ballnose for the roughing cut @ 120ipm at .2 DOC 35% stepover @ 27k rpm (might turn that down abit) did the roughing cut in 2 passes total time 28 minutes.
Finish cut - 3 flute 1/8 tapered 1/4 shank ballnose bit feed 140ipm .04 DOC 12% stepover @ 27k rpm
Profile - 1/4 compression bit feed 60ipm .25 DOC @ 27k rpm
****** IMPORTANT WARNING *******
Keep in mind these feed and settings were just toned down a bit from my larger machine and setup just to do this test piece. I usually use a 8% stepover with a 1/16 tapered ballnose bit to get a very fine finish, no sanding required. DO NOT use these settings unless your sure they will work on your particular machine.
All cutting came out good, bogged just a bit on the profile pass, need to make DOC less and slow down the feed slightly, but all in all very nice. The material was Select clear pine.


I have drag chain coming to tame the mess with wiring, CNCRouterparts is sending some extra plugs so I can hookup my touchplate and the plate for my auto tool setter. Plus I have another care package coming from Openbuilds for some upgrades.
Now for upgrades, during cutting I wasn't happy with where the sawdust was landing and it's potential effects on the final finish of my products.


Now I know I wasn't running a dust shoe, but even my other machine with the large dust collector and shoe, some escapes and gets blown here and there. The sawdust will effect the final finish with the wheels riding on top of it. I'm going to try and make some plastic shields that I can attach between the front and back wheels on the side plates just to try and cut down on the sawdust getting under the belt and in the track. Baring that working as well as i'd like, I might just redesign the side plates to be able to use Openrail wheels on the top and regular wheels underneath, and reroute the belt either below the side linear rail like the FROG or above the wheels on top out of the groove so as to be able and use a wider belt say 3/8 or 1/2 with kevlar cords. Not sure yet. Stay tuned for more updates !!
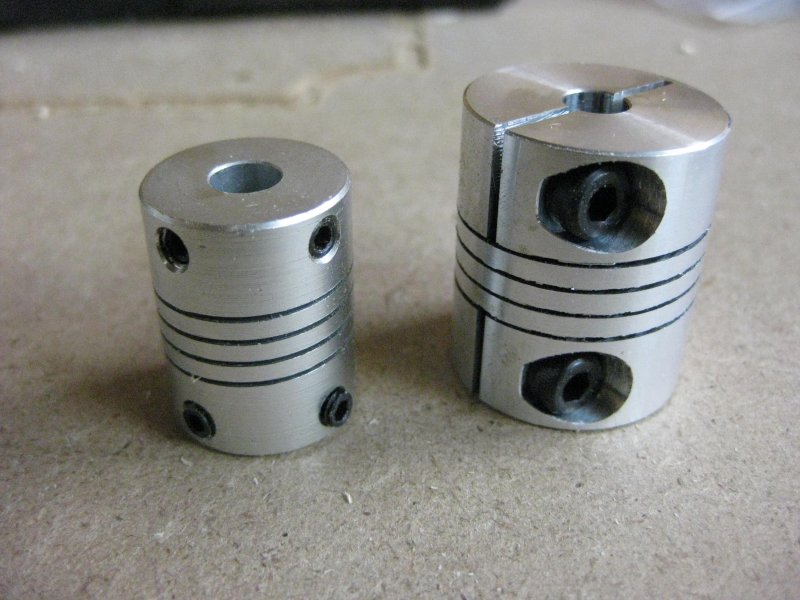
Changed out Z coupler for one without setscrews, much stouter.
11/23/2014
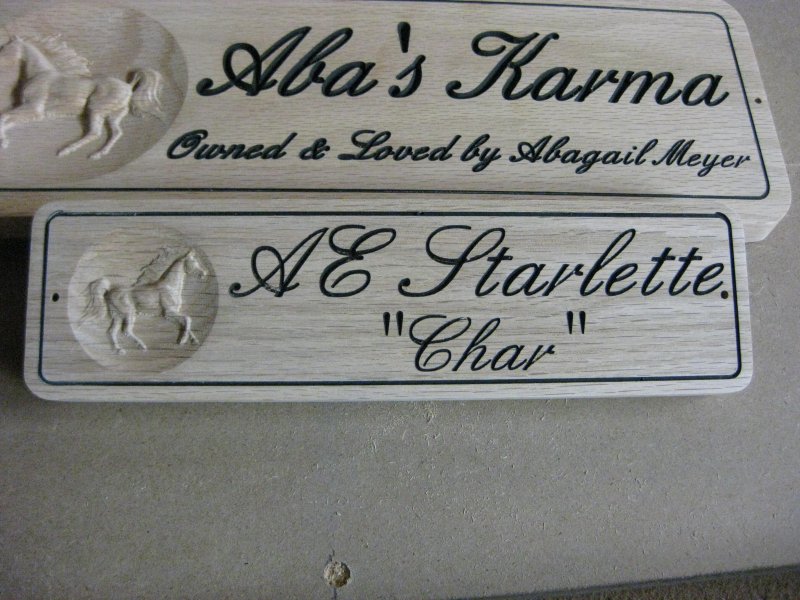
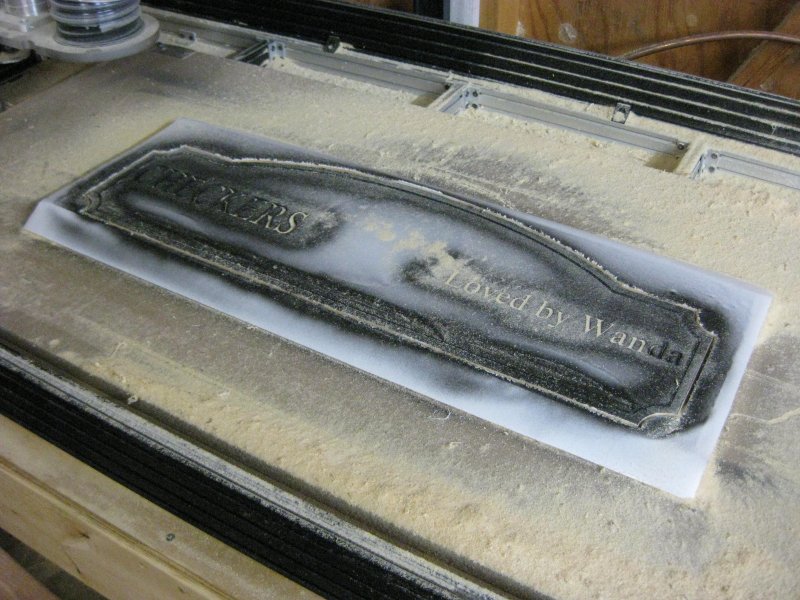
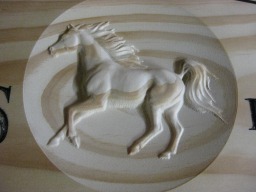
Finished off a couple more things. Installed a jack on top of the Z for my tool touchplate and a clip to ground the collet/tool when setting bit height. Finally got all the kinks worked out of homing and limits, next to setup will be auto squaring for the gantry, just waiting on a couple parts to mount the other limit switch. Cut out a few signs over the past few days, small ones with a mixture of 3D graphic and V carving. Here are a few pictures of a couple I cut today out of red oak.


Here they are finished and sanded, I can spot a few problems that need to be addressed.

Now the problems close up,

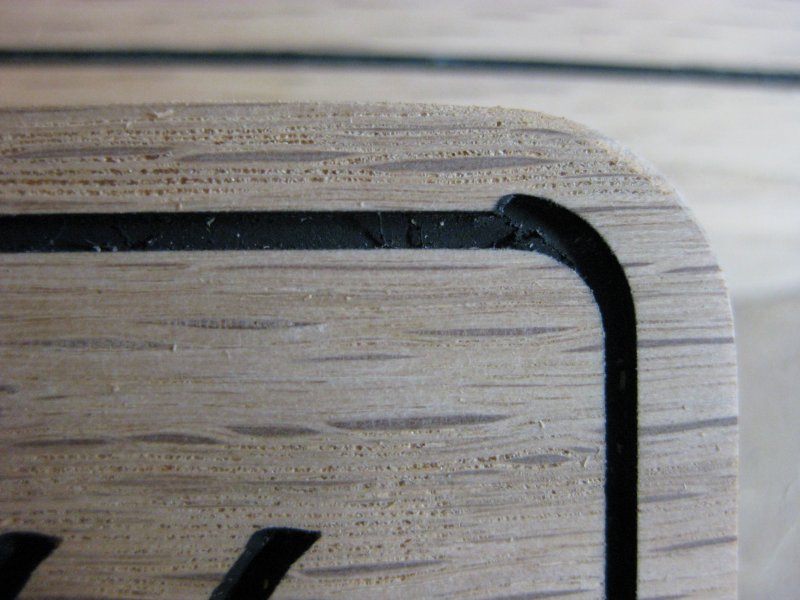

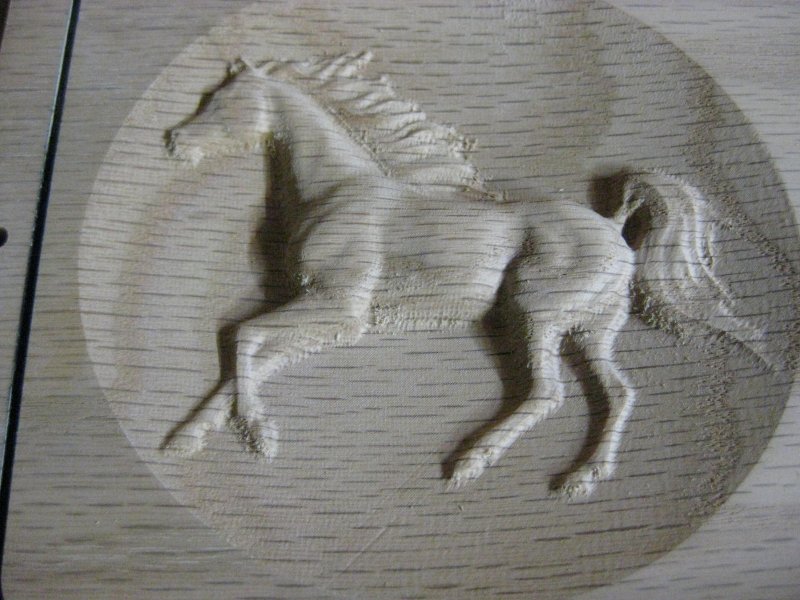
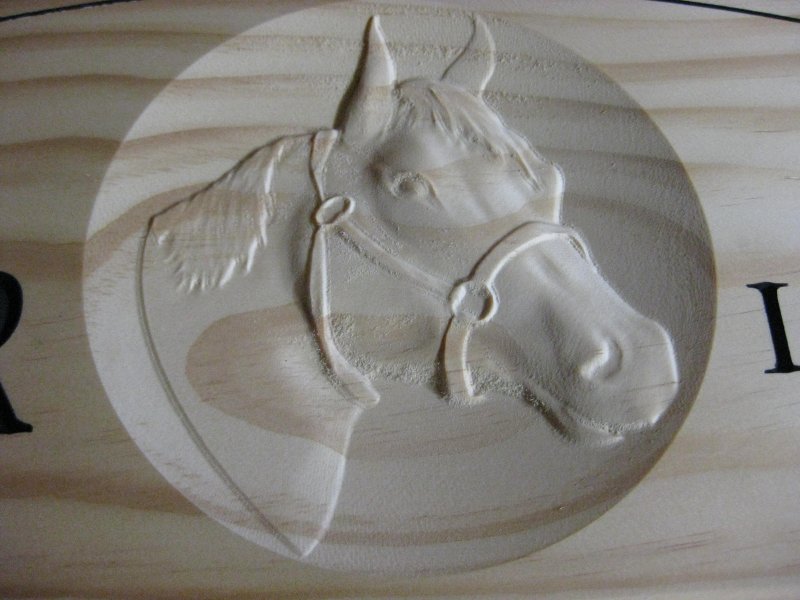
On the larger one is apparent the spoilboard needs to be surfaced due to the deeper letters on the left and tapering off to shallower to the right. Then on the small one the outline was down with a pretty aggressive 1/16 downcut bit, the toolpath runs in the climb direction the reruns in the conventional direction. It appears the bit was able to "pull" when it made it's initial plunge the straightened out. I might have to try ramping the bit into the surface and see if that helps. But all in all, tweak a few things, upgrade a couple others and I think it will be a fine small CNC for our shop. Here are a couple photos of the 3D horse, no complaints there.
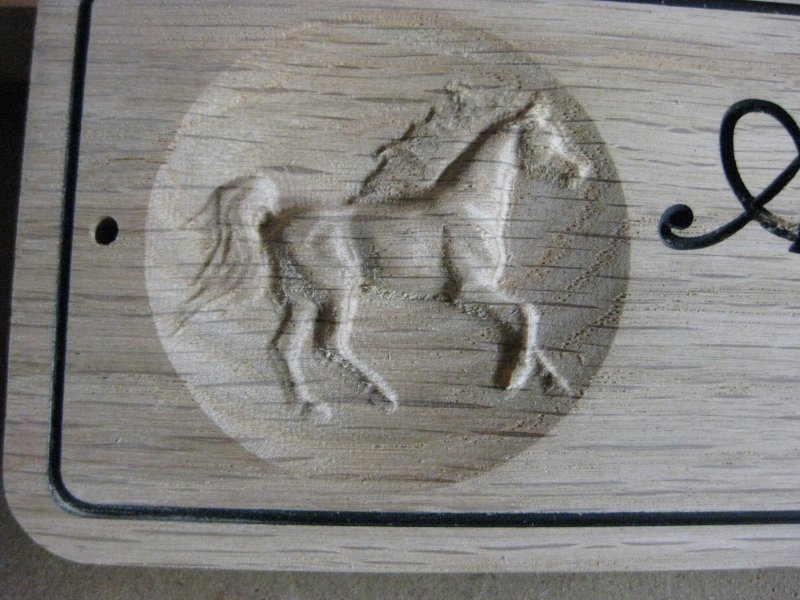
A little cleanup with the dremel and they'll look great !!
11/25/2014
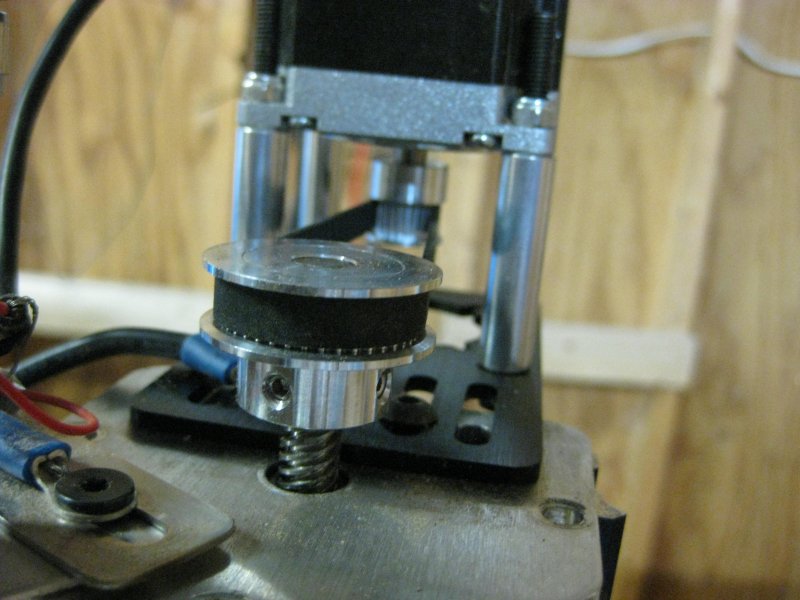
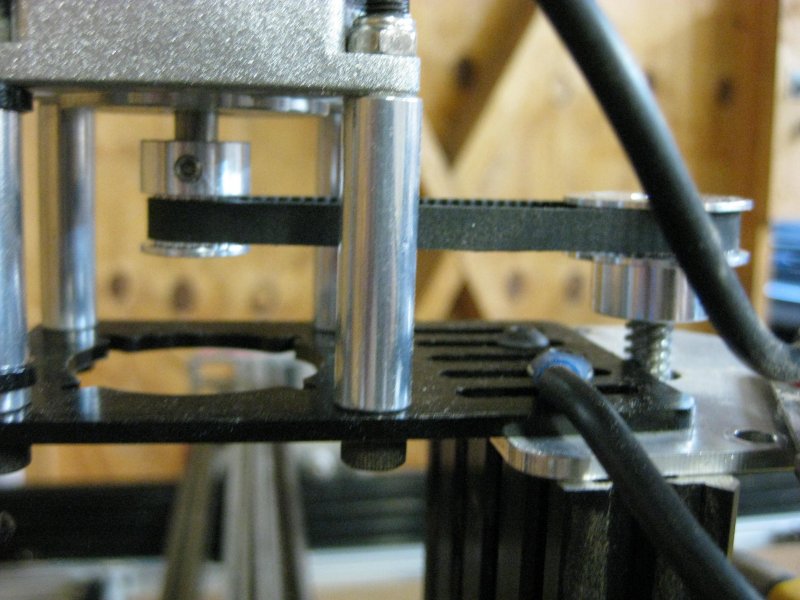
We've been tweaking settings, finally got the auto square for the gantry taken care of, received a few parts from the Openbuilds folks. In the last update I changed out the coupler on the Z to a larger "shaft clamp" style I picked up off Ebay. Well lets just say it was turned on a crooked lathe, I noticed it shook slightly and could see where once clamped to the stepper shaft and the lead screw the alignment was off. I didn't have that problem before with the little setscrew coupler, worked just fine, i'm just not a fan of those tiny set screws. But that's all in the past, I converted the Z to a 2-1 belt reduction drive to get some more torque out of that stepper. Runs smooth as silk, installation was fairly painless, and just had to double the steps on the motor settings.
Reserved
Still not fond of the gantry and the flex between the 2 pieces of 2060 (wish Openbuilds had 4060 avail), and I don't really want to disassemble just to through bolt them together.

So I am converting the gantry over to Openrail mounted on a Misumi 4060 extrusion. I have already redesigned the gantry plates to accommodate the change in spacing moving over to Openrail. Added 2 extra wheels to the top and bottom of the plates, made the plates slightly taller and wider to better space out the wheels and added in idler pulleys. Ordered some 3/8 urethane belts with kevlar cords and matching pulleys. The belt will be rerouted to wrap more around the drive pulley and to ride just above the wheels. Cut some prototype plates out of some tempered hardboard last night and they look pretty good, just a few tweaks here and there. I have also redesigned the side plates moving the Nema 23 motors to the bottom to get the belt out of the sawdust , redesigned the gantry mount holes to where someone could use 2060/2080/4060/4080 extrusions for the beam, also incorporating belt mounts at the proper height so the belt clears the tops of the gantry carriage wheels. These plates are designed to use Openrail as well. Might go 3/8 alum plate of the side plates, probably not necessary, not sure yet. Lots planned !!
Here's a couple more vids and photos of the machine doing a 6" x 6" 3D cut no roughing, just a finish pass.

Cut with a pretty much stock Ox, looks good !!
Last video on cutting i'm posting for the stock Ox CNC.....
Just one more !!


I'm going to have to rename this build Overkill Ox. lol
Florida Ox 2x4 Area 51 CNC Parts Original Build
Build in 'Cartesian Style CNC' published by Hytech2k, Mar 17, 2015.
2x4 Ox with Vac table
-
-
Build Author Hytech2k, Find all builds by Hytech2k
-
- Loading...
-
Build Details
- Build License:
-
- CC - Attribution - CC BY
Reason for this Build
We need a second machine in the shop to keep up with production demands !!


