
I decided to build a Delta printer back in September. This build started out being based on the Delta-Six design, but I decided to see if I could use 3/4" EMT for the horizontal supports. The name of this project has two origins. I started thinking about this design about the time of the 30th anniversary of Back to the Future. Dr. Emmett Brown was the inventor of that DeLorean time machine. It dawned on me that Emmett was the perfect name for this printer since it has only the letters E, M & T in it.
I built a Makerfarm i3v 10" 3d printer over a year ago from a kit & have modified a lot of the wooden parts on it to plastic. This past summer, I built the Mostly 3d printed CNC machine that uses EMT. That is where the idea of using EMT originated in this design. That was designed by Allted.
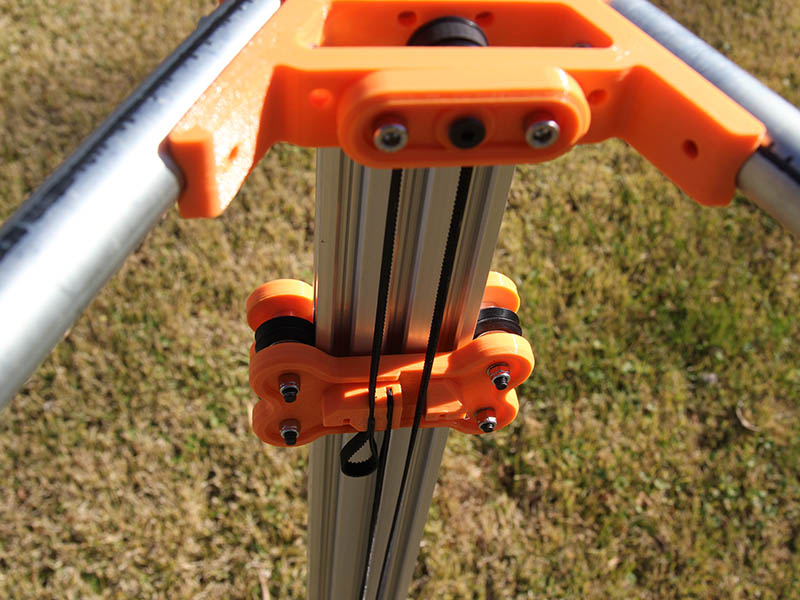
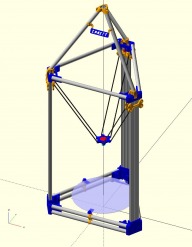
This Emmett-Delta design adds the ability to adjust the tension of the belts at the either the motors at the bottom or the idler plate at the top. The carriage design if it works allows for an extra 1/2" of build height. I really like working with pyramids and the Delta design was just screaming to have a tetrahedron put on top. After installing this, I realized this should add more stability to the build. I am working on a parametric openscad file for the corners of the tetrahedron if others want to use this idea on other V-slot Delta printers.
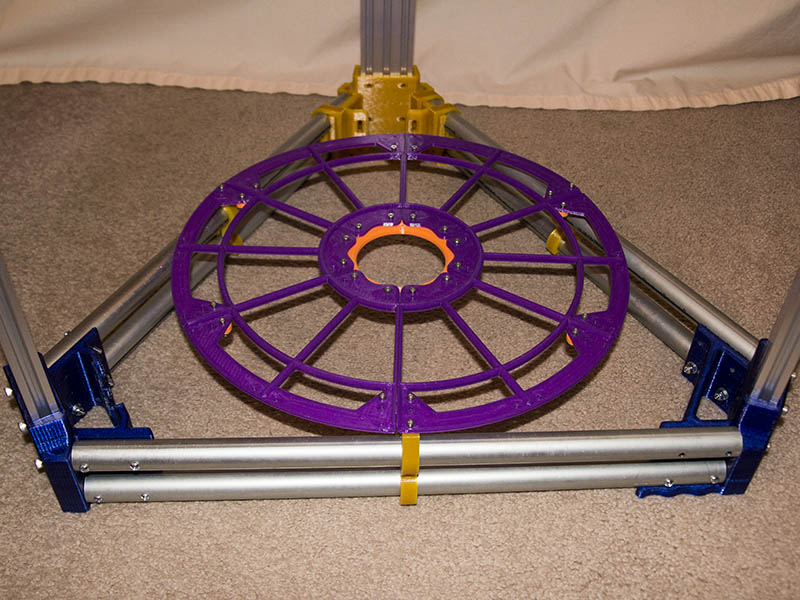
I am currently on a bit of monthly budget, so this build will progress slowly. Working on what I can afford each month. This build is currently sized at about 15" build diameter & about 15" build height. I might size the build diameter down to use the 300mm heat bed, but have not decided yet. I still have not decided on whether to use magnetic or traxxus arms & what length to use. This design currently would require about 515mm length arms.
I have uploaded a zip file of all the parts I have so far in this design as well as a spreadsheet that lists most of the parts you need. I have not gone over that list with a fine tooth comb, so it maybe missing something. The spreadsheet also lists which plastic parts you need to print. You can also adjust most of the parts to your liking using the openscad files. Some parts are easier to adjust than others.
The vertex parts take the longest to print. Each top vertex at 50% infill using PETG plastic took me 7 hours 44 minutes to print and weighs 3.8oz. Each Bottom Vertex at 50% infill using PETG plastic took me 14 hours 17 minutes to print & weighs 7.6oz. There are 2 versions of the top vertex. One where the EMT will be flush with the top of the vertex & one where the EMT will be flush with the bottom of the vertex. Having the pipe flush with the top is probably preferred. The vertex parts also have a ledge at the bottom of the 2060 opening, so the aluminum is recessed a little. There is a slot in each vertex to allow putting wires down through or up through the aluminum cavities. You could also use 2040 aluminum by changing the openscad file. If there is interest in this, I will create a vertex version for this size.
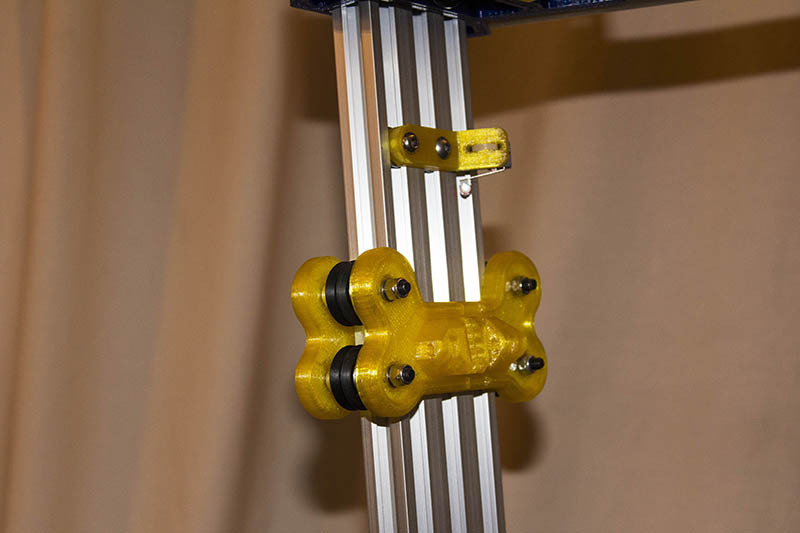
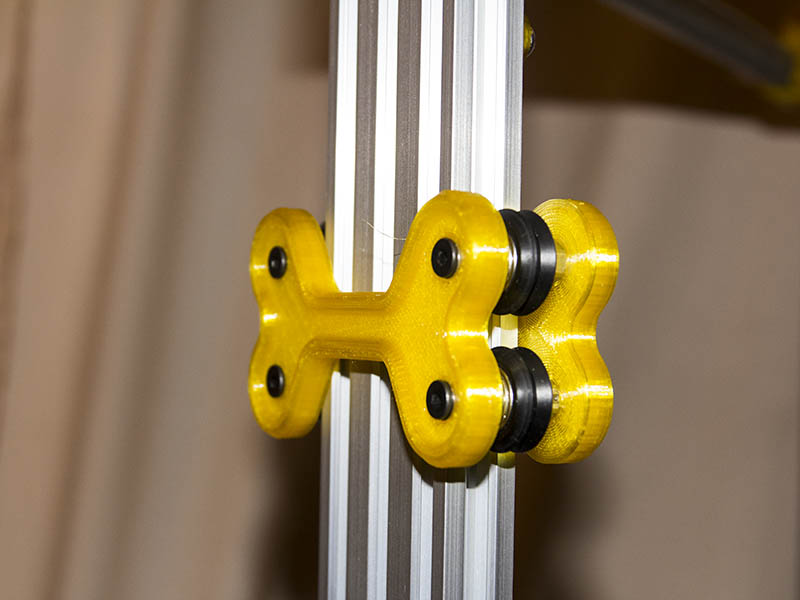
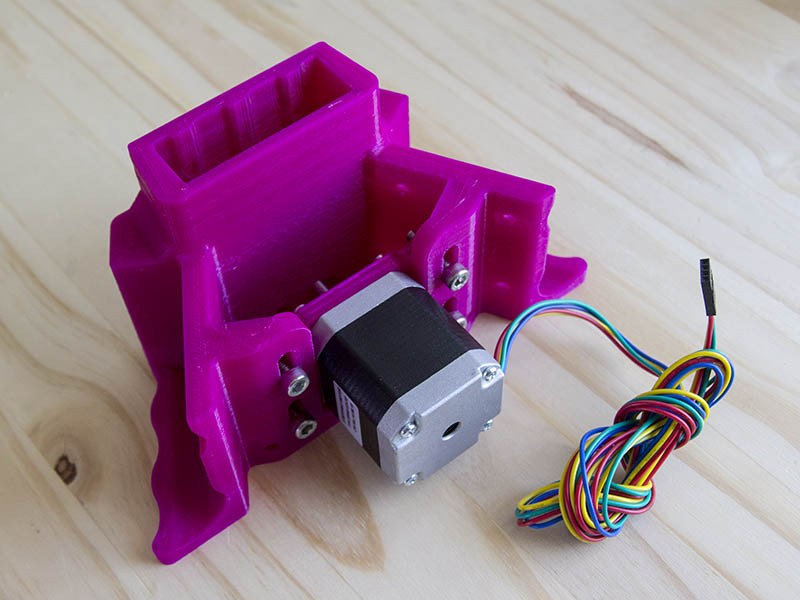
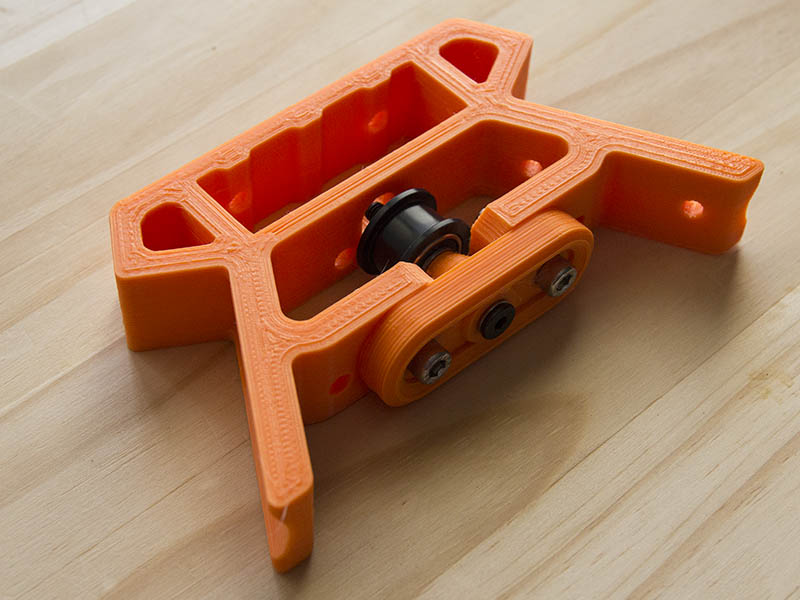
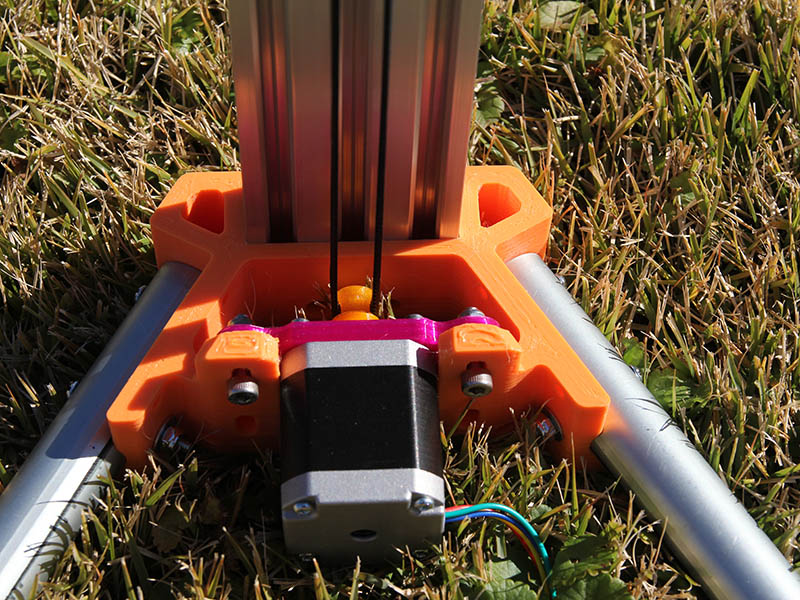
I made 2 versions of the carriage and they both use Traxxas Rods. One version has the center line of the rod connections lower than the center of the carriage & the other is on the centerline. I am not sure whether the version being lower than the centerline will cause more stress on the carriage or not.
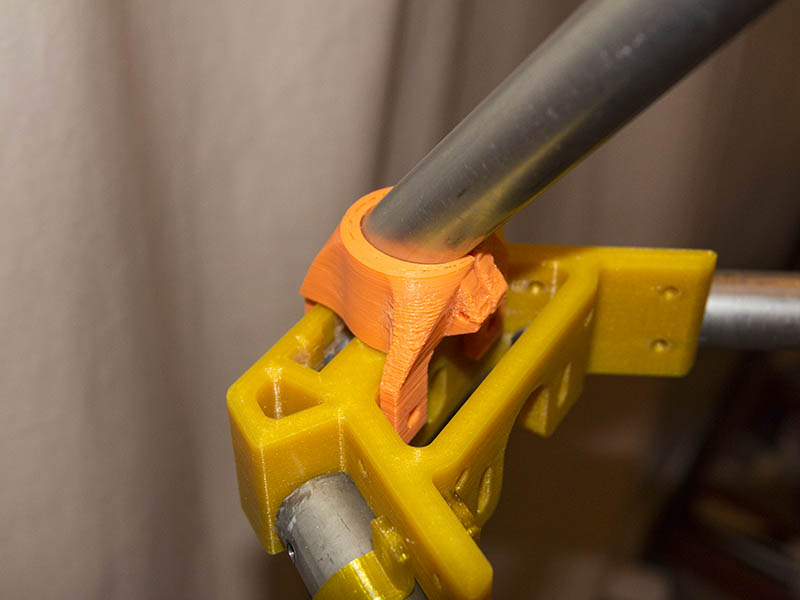
I made 2 different ways to attach the EMT to the Vertex parts. The 1st method involves drilling 2 holes in each end of the pipe. That is 36 holes total. I have a plastic drill template to make this easier. I used a drill press as my accuracy was not good enough just using a hand drill. I also designed brackets to use in place of the drilling. The brackets should be easier to use, but more plastic to print.
The zip file also has a couple of openscad calculators. EMT_Calculator_rev32.scad will show a visually what your design looks like as well as calculating the various dimensions of your size. You can easily change the horizontal & vertical size. This program is not perfect & the vertical might be off a little bit, but was close enough for what I needed. This also calculates the length of pipes to cut for top tetrahedron. This design sure gave me a lot of practice with trigonometry.
I have put a few things on thingiverse that I might use in this design. Here are the links to them.
Parametric Build Plate Support for Delta Printer by GeoDave
Three Magnet Connector for Delta Printer Arms by GeoDave
Parametric Limit Switch Holder for V-Slot by GeoDave
Parametric Tapered Spacer by GeoDave
I am not sure I am going to save any money building this using EMT instead of v-slot for the horizontals, but it has been an interesting design project.
The software I am using for this design is DraftSight, turboCad, openscad & a visual basic program I wrote to create the linear extrude code to paste into openscad from listing polyline data in draftsight. TurboCad I use for converting STL files to DWG & creating the linear extrudes along a path. I have not found a way to linear extrude along a path in openscad yet.
There are a lot of parts here, so let me know if I missed something or you see a problem with this design. I am very new to this design.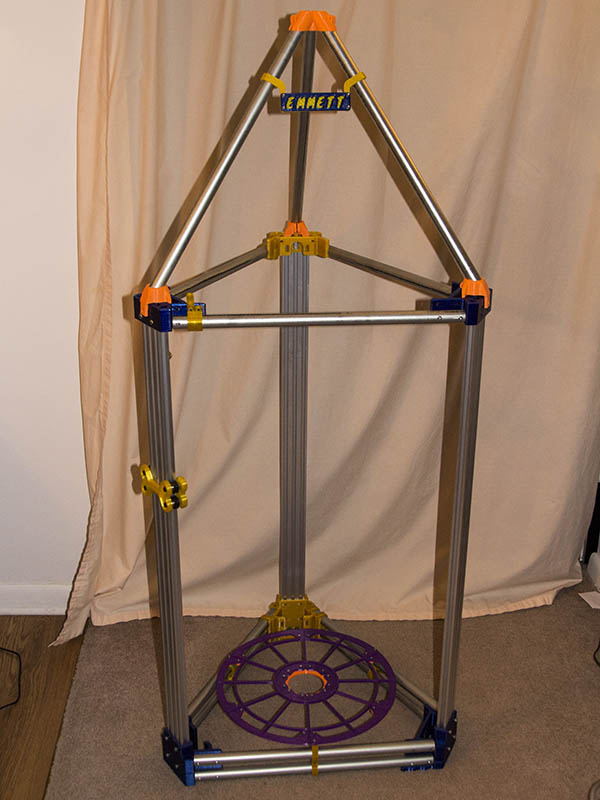
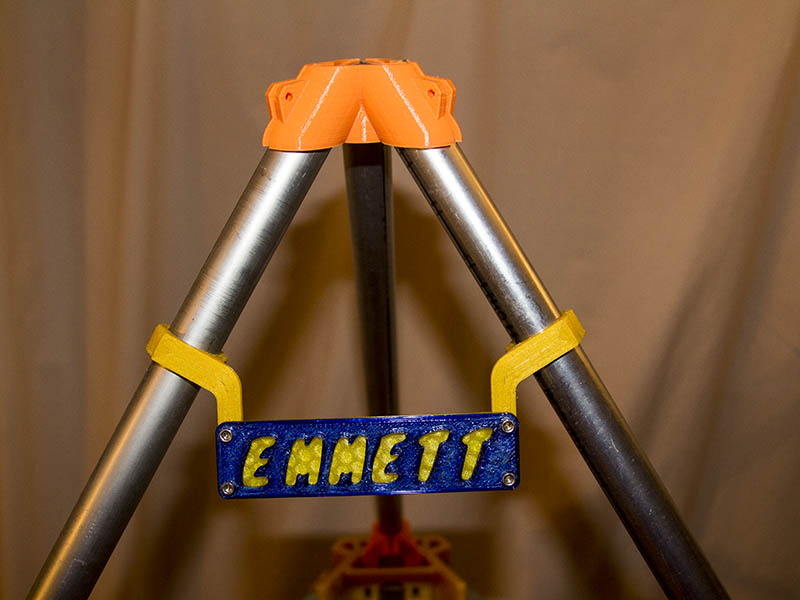

Emmett-Delta
Build in 'Delta Bots' published by David Bunch, Oct 21, 2016.
Delta 3d Printer using 3/4" Electrical Metal Tubing (EMT) for Horizontals & 2060 V-Slot for the Verticals and adding a tetrahedron at the top.
-
-
Build Author David Bunch, Find all builds by David Bunch
-
- Loading...
-
Build Details
- Build License:
-
- CC - Attribution Share Alike - CC BY SA
Reason for this Build
I was looking for a challenge in designing the parts for this printer.Inspired by
Delta-Six and Mostly Printed CNC -
Attached Files: