
READMEThis document is organized like this :
I've done a french translation of this project, you can find it there by following this link.
- Building section with logs
- Usage and choice
- Results
Une traduction francaise de ce projet est disponible en suivant ce lien.
If you want to see the results direclty, go at the bottom of this page.
Good reading and enjoy.
PS: english isn't my mother tongue, you can correct me if u want , I'll have a better english.
Building sectionHi all,
I found the OK CNC build as a very great idea. As I don't really know what I want, my OX build will be a Multi OX CNC. Indeed I would like to use it as a CNC routeur but also as a 3D printer and a Laser engraver (maybe cutter, we will see
Here is my steps :
TODO :
- Order a OX kit at vslot-europe.com and build the frame.
I'll use the same frame as described in the main build, the main modification will be in the electronic section.
Yeah, kit received this monday. I've spent my evening to check the parts and build the frame. The video posted on the build is very usefull for some steps. As it come as a kit, there is no major difficulties. Just an advice, mount the motors befors assembling the frame : I had to unmount bearings to use my hex wrench in a incomfortable position.
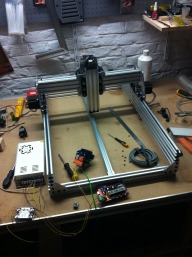
Here is the complete frame mount (without Z axis and tools).

- Wire motors and first test.
Ok, I've not yet connectors. The RAMPS uses standards "header pins" so I'll use dupont crimping pins to connect the differents parts. My motors are in 8 wires configuration so I need to shunt the coils at the connectors. The best way is to find a male connector for my motor but I've no idea about the type.
![IMG_4823[1].JPG](data/attachments/6/6463-780a526c3449a2eff81faca1ec3bba53.jpg)
![IMG_4822[1].JPG](data/attachments/6/6464-7c169b835386f95dd5ed1ff152e38503.jpg)
- Order a new nema17 Z motor (lost the last one during my move) and install it.
- Edit the Sprinter firmware for the multipurpose
As I want to use it as a 3D printer, I prefer to use the Sprinter firmware with RAMPS 1.4 and an Arduino Mega 2560, and with an external temperature regulator (RAMPS + Mega suited for thermistances) as I'm using a thermocouple.
The firmware raise a major problem for me : it's sloooooow if I want to use an external controler for CNC & laser mode. I d'ont want to rewrite entierly the firmware, so I just add a switch which I can select my mode (3D - Router), disable all the code used for printing and read digital inputs to transfer the information directly to the A4988 (no rewiring). To have a better response, I've not used the digitalRead and digitalWrite but I read/write directly the differentes ports.
I use EMC as a CNC controller because I've already used it in the past. The outputs from the parallel port is directly connected on the free IO on the RAMPS board.
To get the right port name I used this document :
Pay attention that I've not yet tested my code (maybe an error with the driver's enable pin that I need to set) with motors. I'll test it soon. The relaying of information from PC to drivers works fine and also the mode selection. I've done the modification by direct port acces to accelerate the processing. As the sprinter firmware include fastio.h (didn't see it while developping), I'll improve the code using this librairy instead of direct port acces.
I've tested with a function generator if the Arduino can follow the signal and hasn't alias. I've not seen alias under 5kHz, but I suppose that the pulses sent by the parallel port are lower than 5kHz. I've just noticed a peak at the raising and falling edges of 1.2V. Maybe an inductance or capacitance effect.


Argh ! 10 mins after I've started to wire the motors, I've seen that as I've 2 'X' motors, I need two drivers. So I must modify before the firmware again to recopy (and invert dir) in the E1 driver. E1 driver seems to not be used in the Sprinter firmware. So I've implemented it only to drive the motor (not for a real extruder !!!, there's no temp regulation) as the complementary of the X in the inverted direction. I've modified some files, you can see the firmware in the files tab. There're maybe some bugs, if you test is, please send me the bugs.
Argggh the devil is with me! I've tested my motors, all's ok and works fine. Also my shaft which is hard to turn, my nema 17 doesn't find it too hard
Well, after test, it's works well. I've also tried to send a gcode coming from another CAM, I'm using pronterface which alow me to control the machine without Cura. When I send a gcode created with inkscape and gcodetools, pronterface receive bad checksums and the machine crash. After a bug report and some research with the developer of pronterface, we saw that the gcode is too much precise. So If I reduce the numbers of decimals, the gcode works well. I'm currently making a c++ executable to reduce the number of decimals.
- Buy a new regulator... I was inattentive yesterday and I put the mains on the TC input. Need a new one
03/24/2015:
- Improve wiring. - OK
- Make correct enclosure for electrics and electronics devices. - OK
- Add endstops - for later.
- Mount a spindle or extruder - OK (extruder)
- Finalize the devel of the simplifier script.
- Cut the bed of the machine. - OK
- Create and enjoy !
Hi all !
It's "a long time" ago that I've not published something here. So what's new ?
05/06/2015:
- Improved wiring
![IMG_5004[1].JPG](data/attachments/7/7919-5928e32f8738769d2eede3526a7644f7.jpg)
A like to have a nice clearance on my realizations. There are some floating wires yet for testing purposes.
- Temp regulation fully functionnal
![IMG_5001[1].JPG](data/attachments/7/7920-ab7b4e9675580138cf03179af6ab7599.jpg)
I've used a REX-C100 to perform a pid regulation. The automatic tune takes time but the results is very good. I suppose would like to improve this by using a mosfet (less noise and no mechanicals parts).
- Relay board
![IMG_5005[1].JPG](data/attachments/7/7923-0a07f2761909eb4a58cb7ba89425304a.jpg)
For the moment, the relay board is manly used for the heater cartridge. Other functions will come later.
- A recycled cabinet.
![IMG_5006[1].JPG](data/attachments/7/7924-7c43481429f5748935f8b1f787bde24f.jpg)
![IMG_5002[1].JPG](data/attachments/7/7921-b0cc755e2dfe79c2de2978388aa06c44.jpg)
- A GCode simplifier
Info will come soon.
Yeah, it's the last run to the finish.
I'm having an issue with the extruder motor which doesn't want to run when I test with pronterface. Not yet investigated, solution will come soon

08/10/2015:
Ok guy's, there were a long time ago I havn't worked on my machine. Not a lot of time, not a lot of money, we have other priorities in the life
I've tested my extruder with my REX-C100 regulator. It worked well since this chineese version broke when I tried to remove the hotend. So a new one was bought, this time coming from Germany. A better construction, but for an higher price.
The motor is wired, also the TC and the heat cartridge. The main problem is to fix it on my rail. It's the activity for this afternoon.
12/01/2016:
Hard to find time to continue my project...
I've mounted the electrical cabinet under the mox, and now I'm planning to move the two power supply (one for 12V motors & electronics and one for the spindle which driven in 48V) because the cabinet is too small for the two ones. I need too to design a door of this cabinet to hold the PID regulators, some lights and buttons.
I've done a first test withous heat bed (so the ABS got difficulties to stick on the plate). The MOX is'nt well configured so the finition of the piece is'nt very good. But... it's a piece.

Usage sectionHere is an explanation of my choices or the configurations for the differents parts. It's a multipurpose CNC so, differents programs are used.
3D printing
I'm starting with a .stl file. The file is sliced using Cura and printed by using the Cura software. The firmware (Sprinter) is modified to allow other functions.
Plotting
To plot a shape, i'm using inkscape with the plugin gcode-tools. But the plugin generate a too precise gcode (too many decimals, the sprinter firmware can't parse all the digits and goes in error). I've developped a very small soft to reduce the decimals in the file. Sources will be released when finished.
Milling
Am in use with the soft Linux EMC2Axis. It's interfaced with the modified sprinter which is copying inputs directly to the drivers without any check: it's EMC which performs the checks and I can have a better speed regulation by working like this.
ResultsComing soon
MOX CNC
Build in 'Cartesian Style CNC' published by Kermareg, Jan 12, 2016.
[EN] Build of my Multiple OX CNC. It's goal is to run in 2 differents modes : router and 3D printer modes. The router mode will allows the use of a laser diode or a standard spindle. [FR] Construction d'une CNC basée sur l'OX pour des usages multiples. Deux modes principaux sont prévus : l'impression 3D et l'usinage via une defonceuses. Le mode usinage permettra à l'avenir de placerune tête laser pour effectuer quelques gravures simples. Une version française : http://kermareg.be/?page_id=103
-
-
Build Author Kermareg, Find all builds by Kermareg
-
- Loading...
-
Build Details
- Build License:
-
- CC - Attribution Share Alike - CC BY SA
Reason for this Build
I was having as a student project a small CNC which has a lot of flaws that could be improved. The vslot was the idea to correct all the mechanicals flaws until I found the OX CNC. for the multipurpose : I tinker a lot in diverses domains and I always dreamed for a 3D printer, they are fascinating.
Inspired by
OX CNC, RepRap -
Attached Files:
![IMG_5003[1].JPG](data/attachments/7/7922-0c28380e6aaca6a3d7b24832033d4a36.jpg)