
Inspired by the OpenBuilds OX YouTube videos, I decided I wanted to have my own CNC machine at home to be able to prototype other designs I have been working on. As I am fortunate enough to have access to another CNC machine and the various materials I have chosen for this build, I figured it shouldn't be to hard to put one together. Famous last words.
As 10mm aluminium plate wasn't an option due to price and availability, I decided to go with the materials that were available to me. Which ended up being a combination of 17mm and 18mm form ply, 3mm and 6mm aluminium plate.
The drawing process was all done in Sketchup. Now in the process of preparing the various sheetcam files for all the different materials that will need to be drilled and cut. Brain breaking stuff, what with all the different tooling and feeds and speeds required.
I will post more pictures of the build as it comes along. Sorry about the quality of the current build picture. The design has changed slightly since this picture was taken.
Enjoy!
Here are some more (sorry), average screen shots.


20/10/14
Good news, finally got all the parts cut, after much swearing, cursing and snapping of bits. As I'm still rather new to using a cnc machine, getting the feeds, speeds and depth of cut right took a little getting used to.
Now the task of actually putting it together. So far so good, everything is slotting together rather nicely. Everything is a little tight, but I think that's a good thing.
Photos to follow soon.
21/10/14
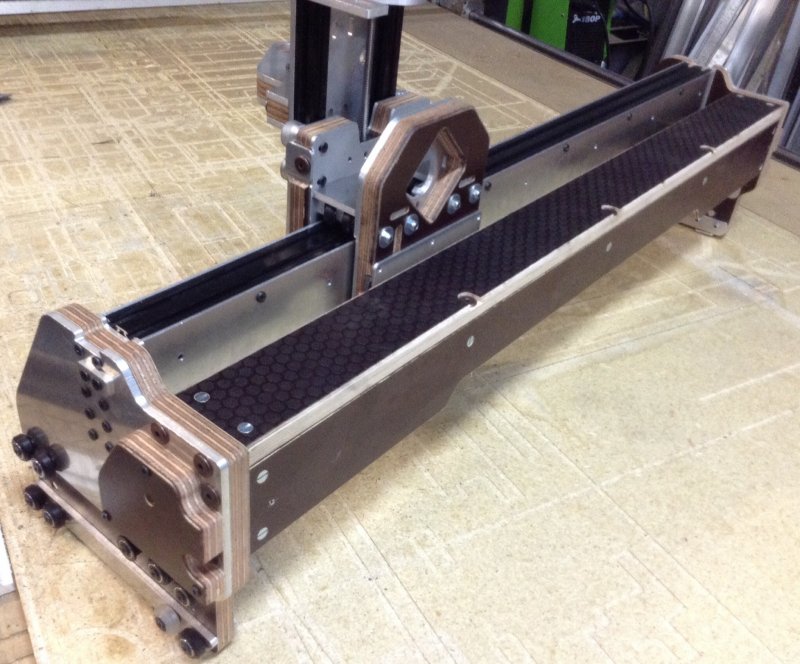
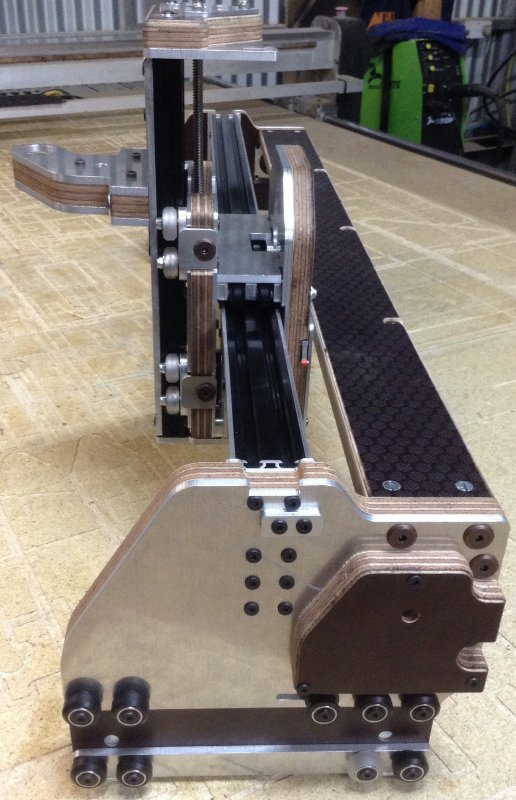
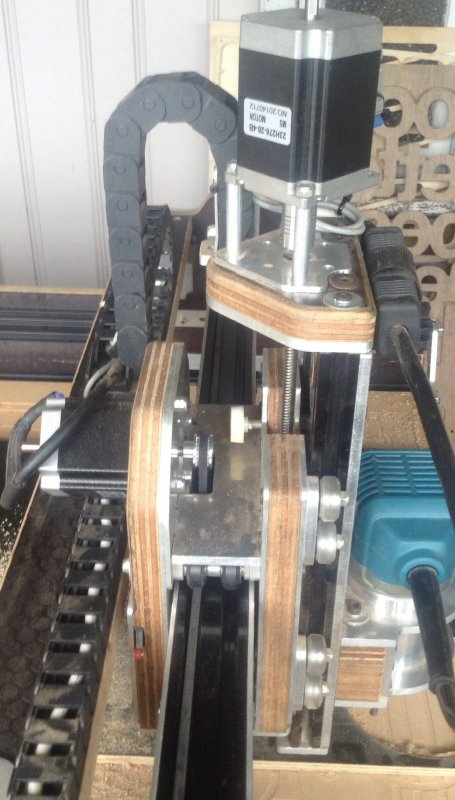
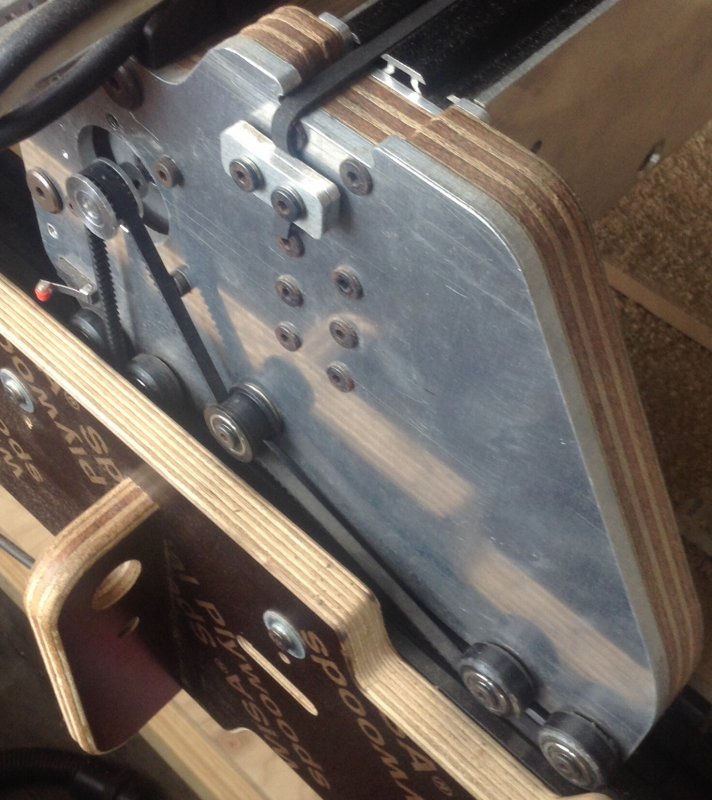
So here is the gantry almost done, minus motors.
Extremely happy with the way it has turned out so far!
All the time spent so far in the design process has really paid off. It's probably been 2 to 3 months on and off of staring at a computer screen for hours on end.
Starting to wonder if all that mass in the gantry is such a good thing? But then I think I read somewhere it can be a positive thing?
What is the working load of GT2 belt?
Oh well, slower acceleration and deceleration.
27/10/14
Exciting times, thanks to some wonderful people the drive and motors should be arriving some time this week! I have chosen to go with a Gecko G540, 4 Nema 23 steppers and a 48 volt power supply.
In theory this thing should fly.
Cabling has been a little hit and miss. Decided I wanted to slightly over spec the cabling and went out and bought some rather cheap four core, 1mm squared per core, shielded cable. Unfortunately it wasn't till I got it home that I realised that the cable was far to brittle for the job.Oh well. So the next best thing I could find for now was some four core 18 AWG, un-shielded cable. Fingers crossed that this will do the the trick. If anyone out there has some advice on shielded vs un-shielded I'd love to hear it.
So for now, it's time to get all the limit switches wired up and get all the motor power cables in place and ready for when the motors and drive arrive. Hopefully that'll be sooner than later.
Still waiting on some crucial bits though before it takes it's first steps
More photos soon.
30/10/14
The motors and drive arrived today!
Time to start installing it all, minus the bits I mentioned above. Hopefully they arrive next week some time so I can get this thing moving.
Can't believe how small the G540 is.
I'll post some photos in the next couple of days, once its all tidied up. Stuff everywhere at the moment.
6/3/2015
Ok, so I'm pretty slack when it comes to posting stuff. Sorry..
So a little while has passed since my last post. In this time I have been cutting all sorts of stuff, mainly out of plywood, with varying degrees of success. Backlash being the main problem!
Here is a little test pattern to give you an idea of where I'm at.
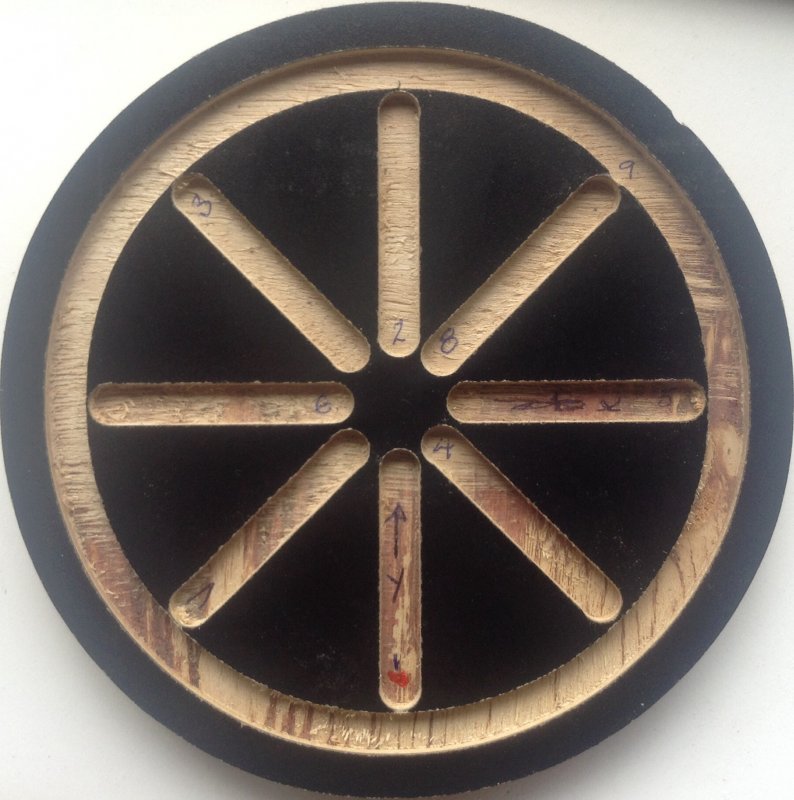
The red dot is the start point, the numbers represent each start point. Cut number ten is the outside starting just to the right of nine.
I'm wondering if anyone out there could give me some pointers on where to begin nailing down the evil backlash maybe using the picture as reference.
One thing is striking me as odd is that as the bit leaves the work surface it seems to kick out a little. Really pronounced on the exit of cut number 4. Any ideas?
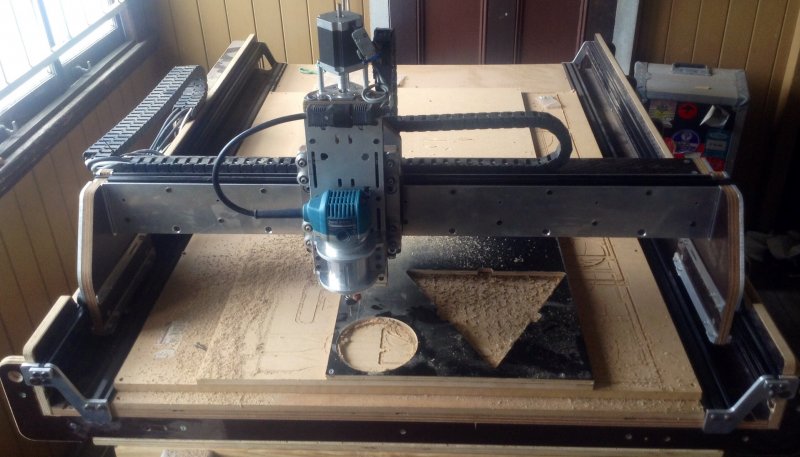
Here are some more photos of the machine. Excuse the photo quality, I'm not a photographer by any stretch.

If anyone has any advice or questions, feel free to ask.

The RAT. A form ply and aluminium hybrid.
Build in 'Cartesian Style CNC' published by Slewratesarego, Mar 5, 2015.
A hybrid of form ply and aluminium. 835x1260x100mm working envelope.
-
-
Build Author Slewratesarego, Find all builds by Slewratesarego
-
- Loading...
-
Build Details
- Build License:
-
- CC - Attribution NonCommercial - Share Alike - CC BY NC SA
Reason for this Build
Wanted to be able to prototype my designs at home rather than constantly asking my friend if I could use his machine.
Inspired by
The OX. Thank you Mark! -
Parts list
Qty Part Name Part Link Comments 40 Solid V Wheels http://openbuildspartstore.com/openbuilds-solid-v-wheel-kit/ Link 4 1500mm V Slot 20x40mm http://openbuildspartstore.com/black-v-slot-20-x-40mm/ Link 4 1000mm V Slot 20x40mm http://openbuildspartstore.com/black-v-slot-20-x-40mm/ Link 1 1000mm V Slot 20x20 http://openbuildspartstore.com/black-v-slot-20-x-20mm/ Link 2 Idler Pulley http://openbuildspartstore.com/smooth-idler-pulley-kit/ Link 1 8mm ACME Lead Screw 1000mm http://openbuildspartstore.com/8mm-metric-lead-screw-acme/ Link