
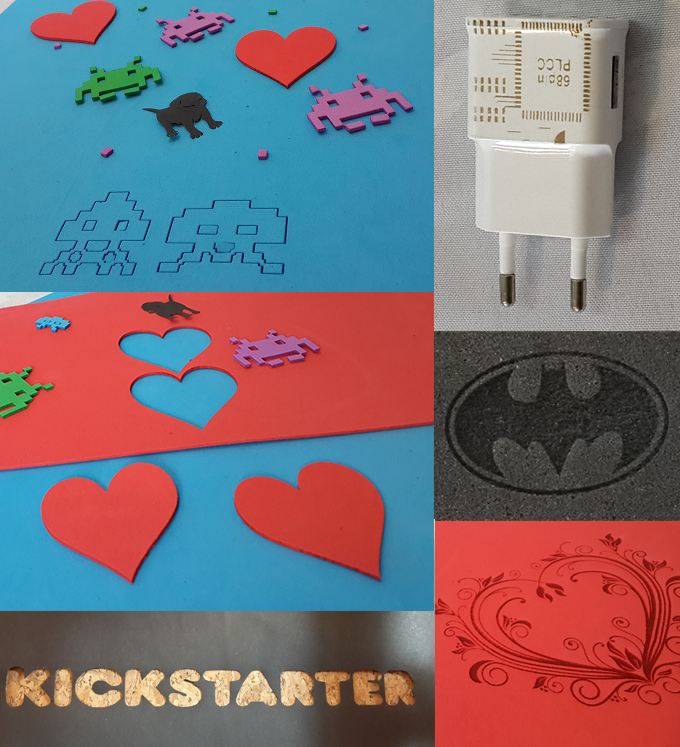
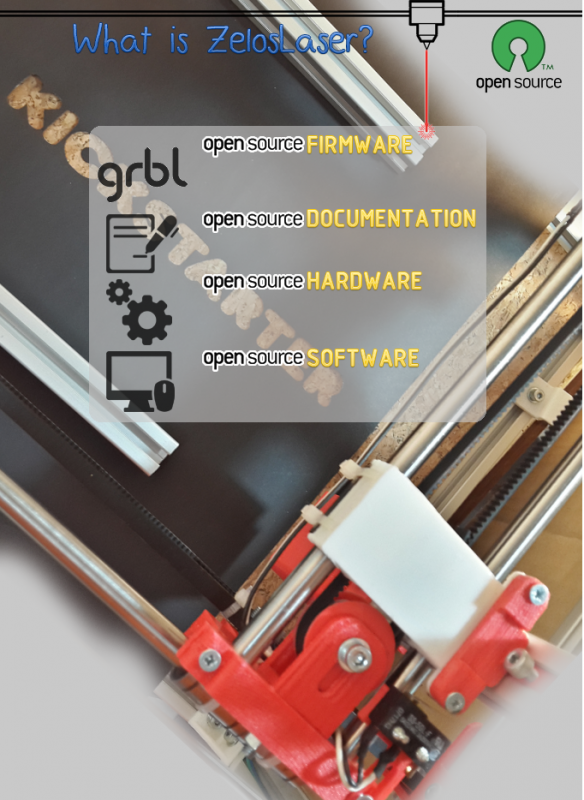
The Open Source ZelosLaser Cutter V2 is a full working unit to engrave and even cut material like plastics, wood, leather and much more. It is easy to build and has a number of exclusive features that cannot be found on other engraver machines.
If you use it, please share a picture!
Get your KIT today on
++Kickstarter++


3D PRINTED PARTS IN PLA --- .STL files
TOOLS
Tools you need
a brush or something similar
- Allen Key M4
- plier screwdriver
- screwdriver
Metalsaw when the steel rods or aluminum profiles are not even cut when you buy it.
Jigsaw when the base plate has not been cut when buying
some wood glue (to glue a thin layer of cork on the bottom plate)
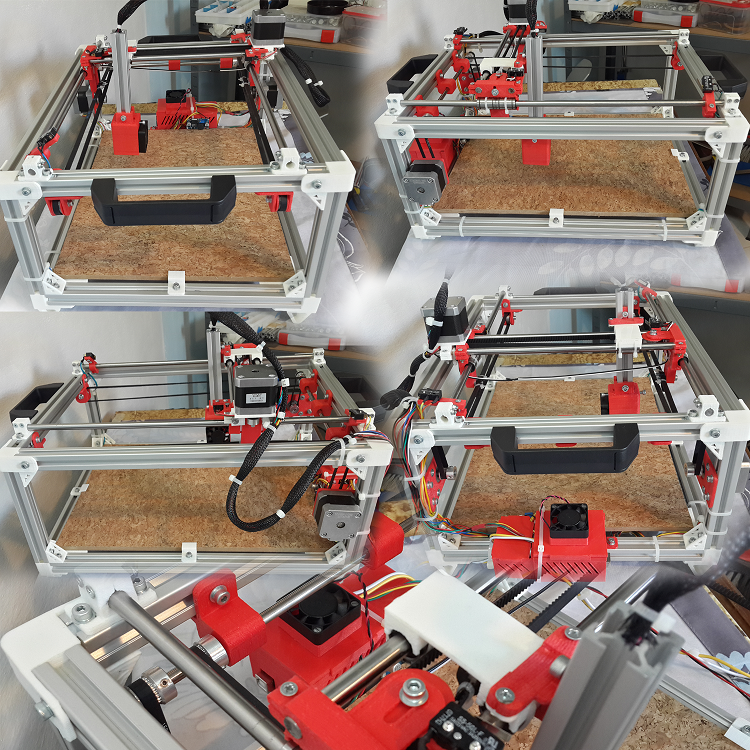
BUILD IT
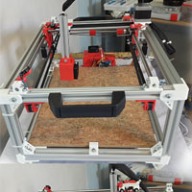
Begin with the aluminum profiles. screwed all together like in the Images.
Do not forget to push enogh M4 threaded plates into the V-slot of the profile.


Baseplate


glue the cork to the bottom plate as in the photos.
use a brush or similar to remove all the small blisters.
Turn around the bottom plate and put some weight on it.
Wait until the glue is dry.
Attach the handholds and Baseplate to the Frame


Attach the handles with 4x - M4x20 screws.
Attach the Base Plate with the printed Holders.
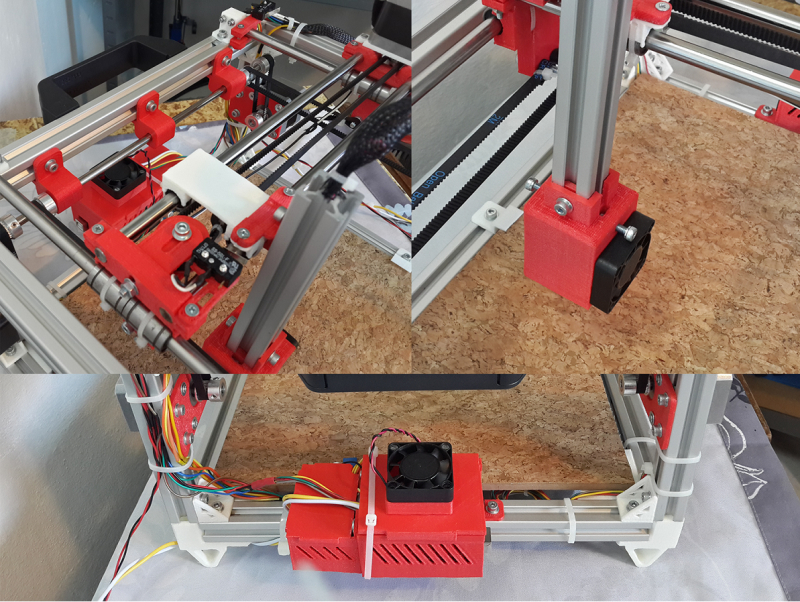
Prepare the axis

Sliding/push the LM8UU linear bearings on the Steel Rods.
Attach the steel rods to the chassis.
fix the carriage to the linear bearings with cable ties.
Electronics/wiring
Wiring Diagram for 2watt Laser


For the wiring we use a very reinforced system.
it is very easy to build and works great.
-If you want to use two motors with two Stepper Driver for Y axis, you can "clone" any axis for use two motors and two drivers for a single axis. The CNC shield is capable of it
Check this for more CNC shield infos.
Don´t connect the laser before adjust the power on the laser driver.

SOFTWARE


Before you can start you need the Arduino IDE, available on their webpage.
Arduino IDE
---------------------------------------------------------------
Modified firmware for the Arduino UNO R3 or similar clone:
GRBL0.9i_Library_zelosLaserengraverV2.zip
(Modified for Version 2.0 ZelosLaser Cutter with 2 Axis)
Grbl wiki: github.com/grbl/grbl/wiki
---------------------------------------------------------------
drawing software: Inkscape 0.91/combined with a laser engraver plug-in.
(might be already with the G-code plugin in the installation)
Inkscape Website
---------------------------------------------------------------
Grbl needs G-Code.
We need another Program to send the G-Code to the Arduino UNO R3 board.
Grbl Controller 3.0 by Zapmaker
#############################################
NOTE: Before starting, make sure that any older installation of Grbl has been completely removed from the Arduino IDE.
Download the Modified Grbl source code (v0.9i)
Once downloaded, unzip it and you'll have a folder called grbl-master or something similar.
Make sure you are using the most recent version of the Arduino IDE (last tested on v1.61).
Load Grbl into the Arduino IDE as a Library.
- Launch the Arduino IDE.
- Click the Sketch drop-down menu, navigate to Include Library, and click Add .ZIP Library, note that this still works with a folder (prior to IDE version 1.6.2 this will be Import Library..., and click Add Library...).
NOTE: For pre-v1.05 Arduino IDE users, you will need to manually add Grbl into your Arduino libraries, so that it will appear in the Import Library... menu. Search the internet for how to install, then skip to step 4.
- Select the Grbl folder inside the grbl-master folder when asked to select a library folder you'd like to add. The correct folder only contains the source files and an example directory.It may take a few seconds for the Arduino IDE to import it.
- Open the GrblUpload Arduino example.
- Click the File down-down menu, navigate to Examples->Grbl, and select GrblUpload.
- Compile and upload Grbl to your Arduino.
- Connect your Arduino Uno to your computer.
- Make sure your board is set to the Arduino Uno in the Tool->Board menu and the serial port is selected correctly in Tool->Serial Port.
Once you have your Grbl library set up in the Arduino IDE, you can update, replace, or modify the Grbl source code in the library folder. On a Mac, it's located in ~/Documents/Arduino/libraries/. On Windows, it's in My Documents\Arduino\libraries.
- Click the Upload, and Grbl should compile and flash to your Arduino! (Flashing with a programmer also works by using the Upload Using Programmer menu command.)
You may need to restart the Arduino IDE for this change to take effect.
No fuss! No muss!
https://github.com/grbl/grbl/wiki/Compiling-Grbl
I hope you guys like my tutorial.
many greetings,
Nico, Founder of Zelos-Dynamics
ZelosLaser Engraver/Cutter 2.0 : Sturdy & Versatile
Build in 'LASER - PLASMA BUILDS' published by zelos, Aug 13, 2015.
Zelos Laser Cutter Version 2.0 GRBL Shield with Nema 17 motors. 2 Watt laser for cutting and fine grayscale pictures built very sturdy and modular
-
-
Build Author zelos, Find all builds by zelos
-
- Loading...
-
Build Details
- Build License:
-
- CC - Attribution NonCommercial - Share Alike - CC BY NC SA
Reason for this Build
I start to plan the ZelosLaser Engraver with the goal of a well-built, Open Soft and Hardware Machine.The ZelosLaser Engraver and cutter is affordable, with a compact design and the perfect entry for the Daily Hobbyist.
It is easy to build. even for the non Hobbyist. -
Parts list
Qty Part Name Part Link Comments 5 Aluminium profile 20x20 Type B Link 15cm 4 Aluminium profile 20x20 Type B Link 30cm 4 Aluminium profile 20x20 Type B Link 40cm 8 Screws Link M2.5x15 (Wood version 13 -M3 Allen SCREW Link M3x10 6 -M3 Allen SCREW Link M3x16 12 -M3 Allen SCREW Link M3x20 5 -M3 Allen SCREW Link M3x25 89 -M4 Allen SCREW Link M4x8 14 -M4 Allen SCREW Link M4x20 89 washers Link M4 wide Brim 24 nuts Link M3 Normal 8 M3 lock nut Link 20 M4 Normal Nut Link 96 M4 threaded plate Link M4 0 Link 1 GT2 Timing Belt Link 57CM 2 GT2 Timing Belt Link 87CM 2 GT2 Timing Belt Link 158mm Closed Loop 3 Timing Pulley Link GT2 20 teeth, 5mm Bore 4 Timing Pulley Link GT2 20 teeth, 8mm Bore 1 Steel Rod 8mm diameter Link 29,5cm 2 Steel Rod 8mm diameter Link 29CM 2 Steel Rod 8mm diameter Link 42CM 6 LM8UU linear bearings Link 3 608z bearings Link 1 MDF Wood Base Plate Link 28x32 / 7mm thin 1 Laser protective glasses Link 3 Nema 17 stepper motor Link 36oz 1 Arduino Uno R3 or clone Link 1 GRBL-Shield Link 2 Pololu a4988 Stepper Driver Link 1 Power Supply 12V / 4A Link 2 12V fan 4x4cm Link 2 Power Switch Link 1 Laser protective glasses Link 1 Laser Module Link 445nm 2watt M140 diode Copper Modules With Leads & Three Element Glass Lens 1 Laser Driver 3A 450nm TTL Link 4 Endstops Link 2 handholds Link 1 Various cable, different plugs ... Link 1 3D PRINTED PARTS Link -
Attached Files: